This tutorial will focus on running the Simulink model which was created in Tutorial 1 in Zynq-7000 (Zybo 7Z-20) hardware. The first half of the tutorial will guide you to create the hardware design in Vivado design suite. Then it will continue with implementing the Simulink model to run the Image classification algorithm in Zynq-7000 target.
Before start the tutorial, add the ARM Compute library to the Waijung 2 in [Folder path to waijung2 folder]\targets\zynq7000\utils. Please follow the steps below.
1.First download the ComputeLibrary-main.zip file from here
2.Extract the zip file
3.Copy the ComputeLibrary-main folder to the [Folder path to waijung2 folder]\targets\zynq7000\utils folder path
Make the hardware design using Vivado
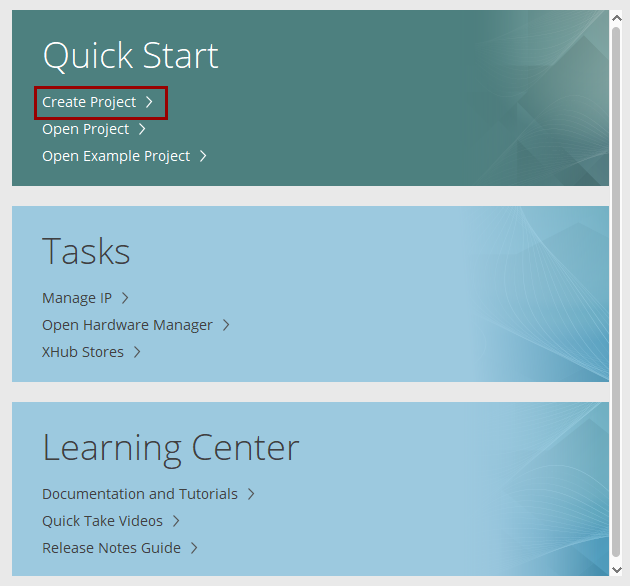
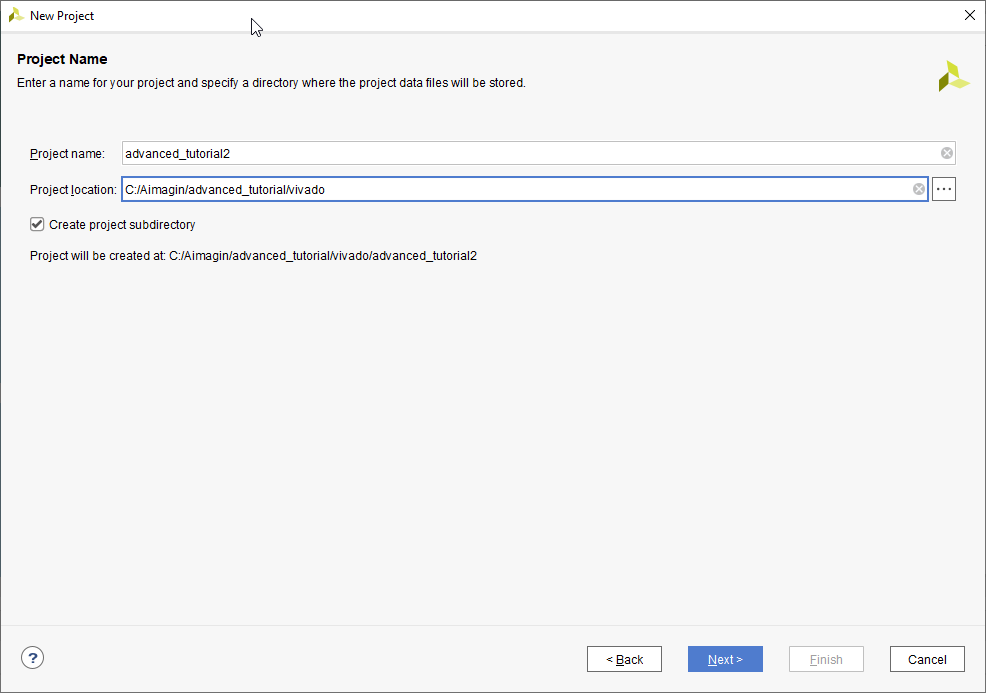
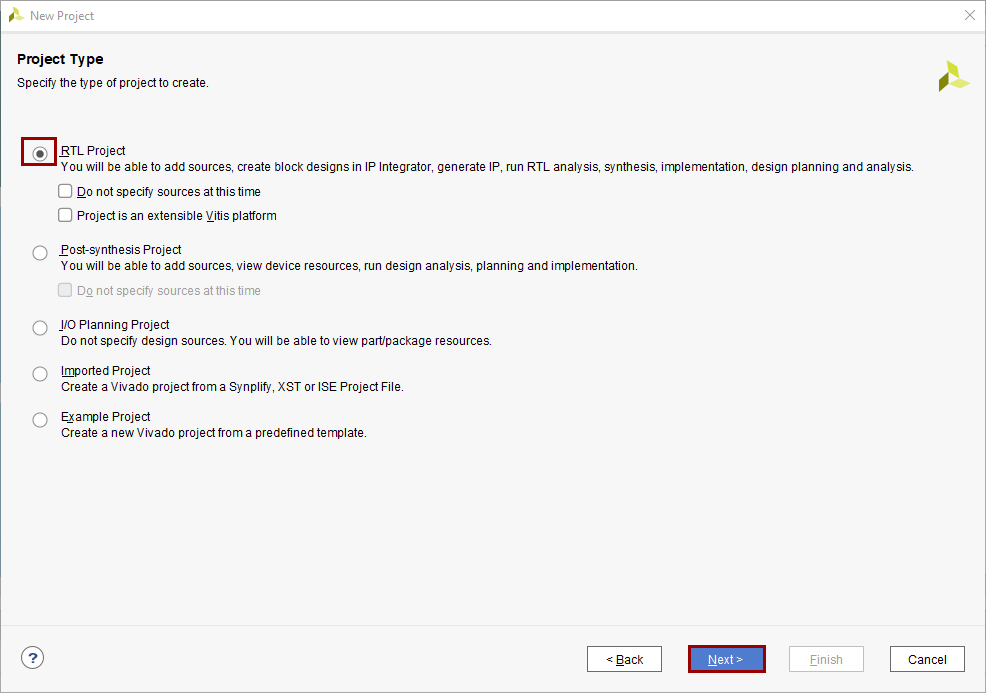
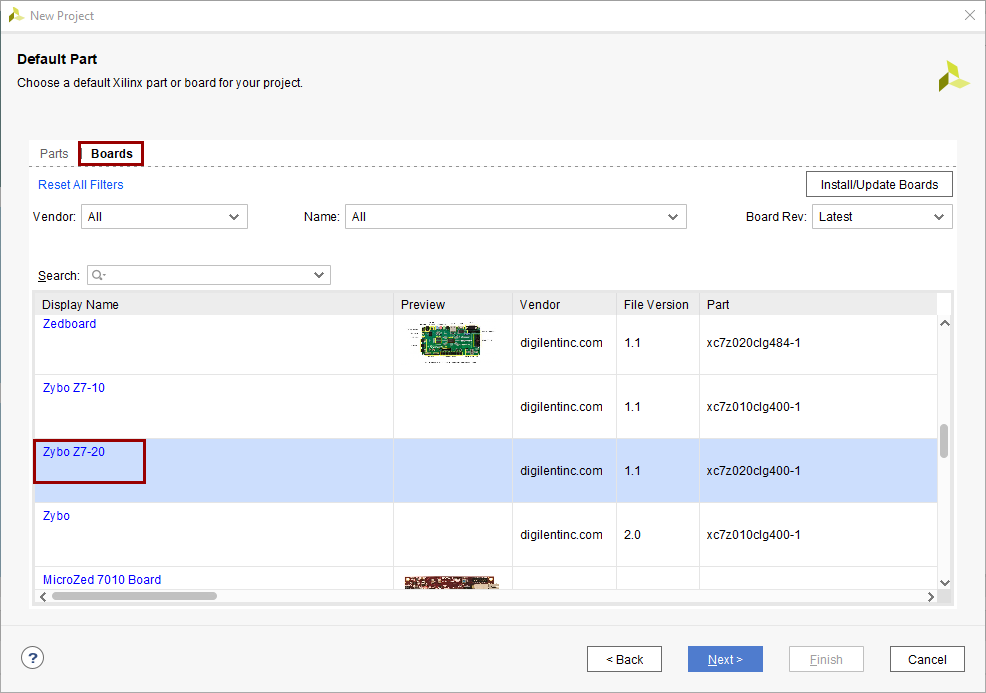
1.Open the Vivado design suite and create a new project and select the Zybo 7Z-20 as the target board.
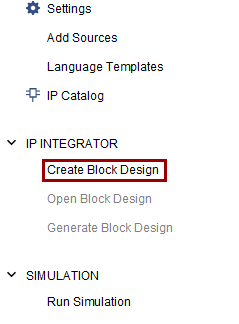
2.Then click on Create Block Design to configure the Zynq-7000 and next click OK to the dialog box
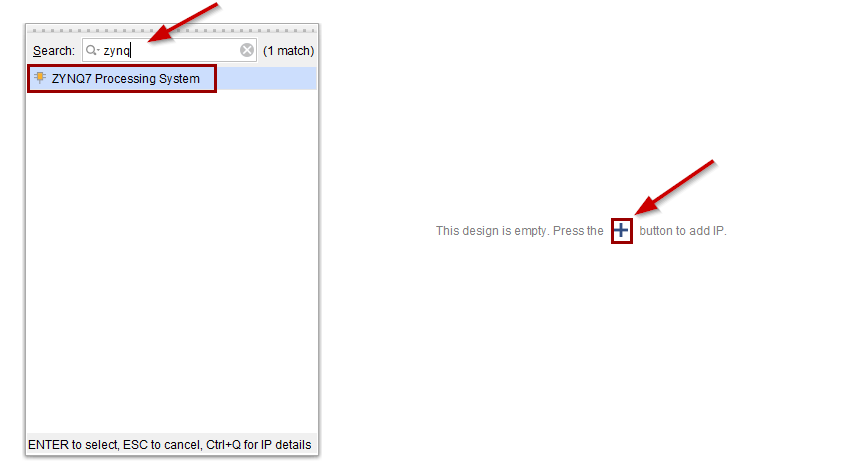
3.Add the ZYNQ7 Processing System IP to the workspace and run block automation

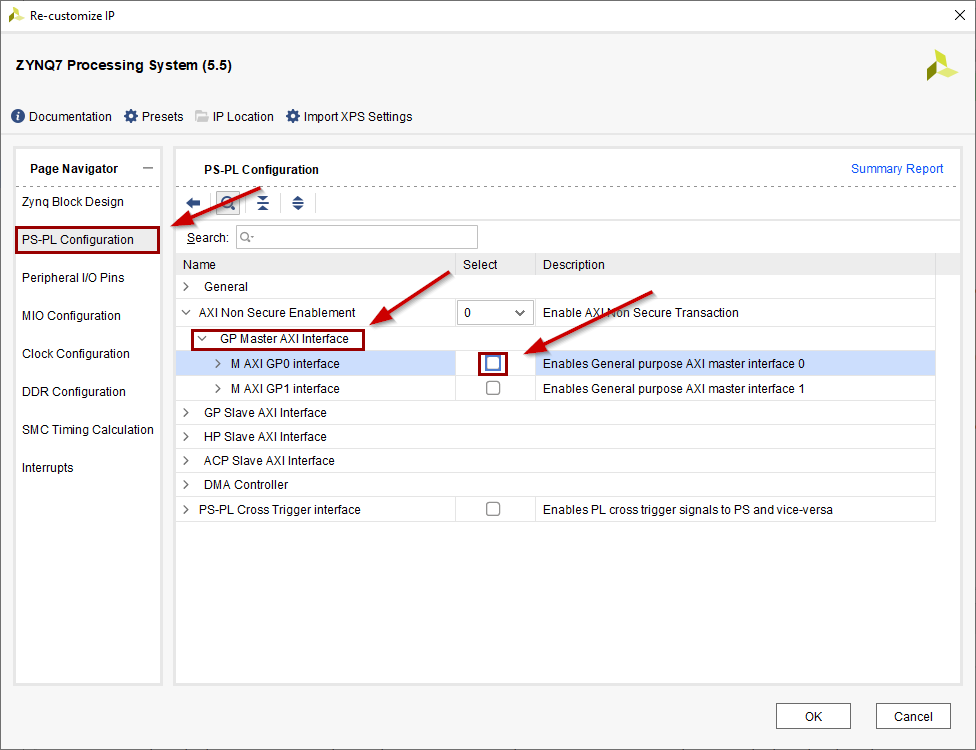
4.In here, M_AXI_GP0 is not required for this project. To remove it, double click on the IP. Then go to PS-PL Configuration, expand AXI Non Secure Enablement, expand GP Master AXI Interface and disable M AXI GP0 interface. Next click OK
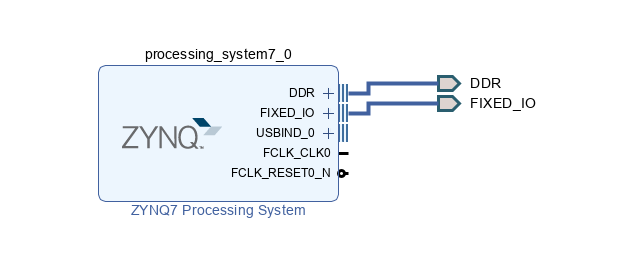
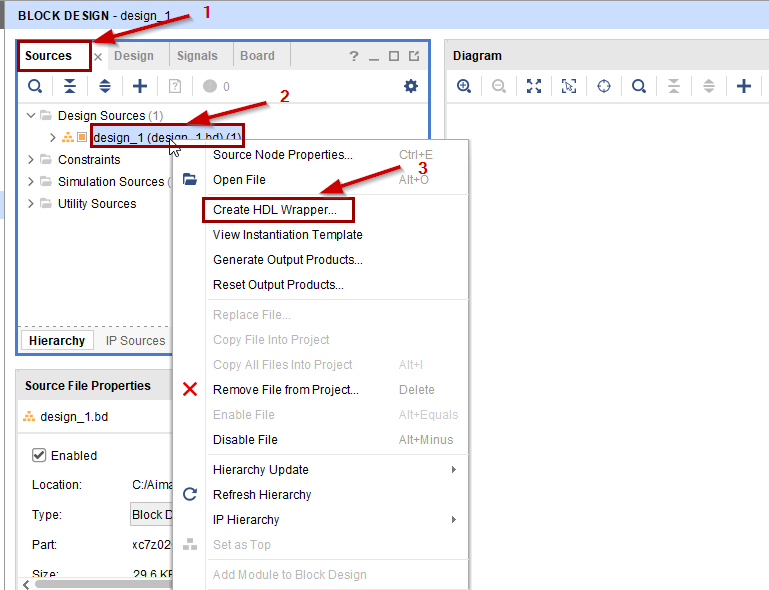
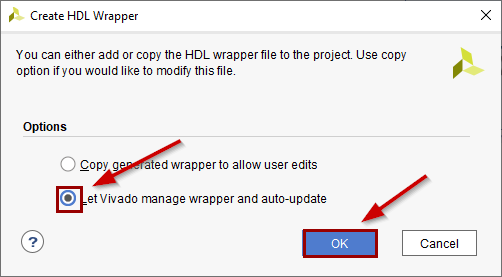
5.Save everything and then generate the Bitstream, first go to Design Sources under Sources. Then right click on design_1 and select Create HDL Wrapper. Select Let Vivado manage wrapper and auto-update from the selection and click OK
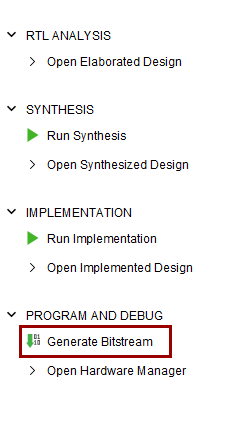
6.Once that process is finished, generate the Bitstream by clicking on Generate Bitstream. Then click Yes to continue.
7.Once the process is finished, click Cancel to the popup dialog box. Next, the remaining task is to export the hardware design file from Vivado. For that, go to File → Export → Export Hardware. Click Next on the wizard. Next, select Include Bitstream from the selection and click Next. Then give a proper name for the hardware design file and the location to export.
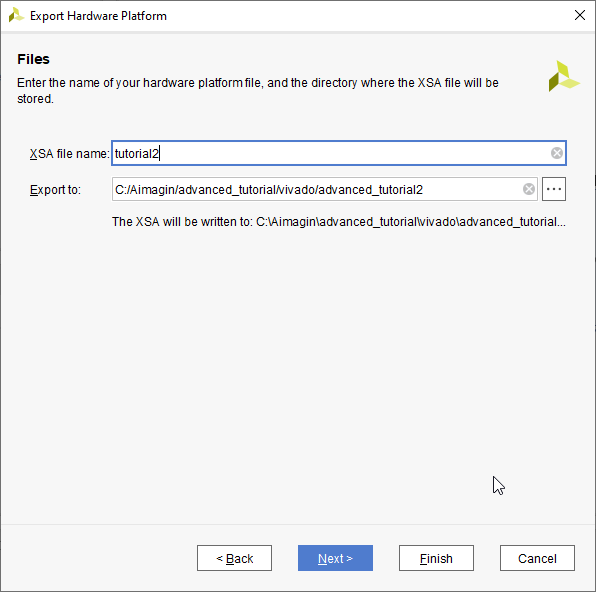
8.Then click on Next and click Finish
Create the Simulink Model
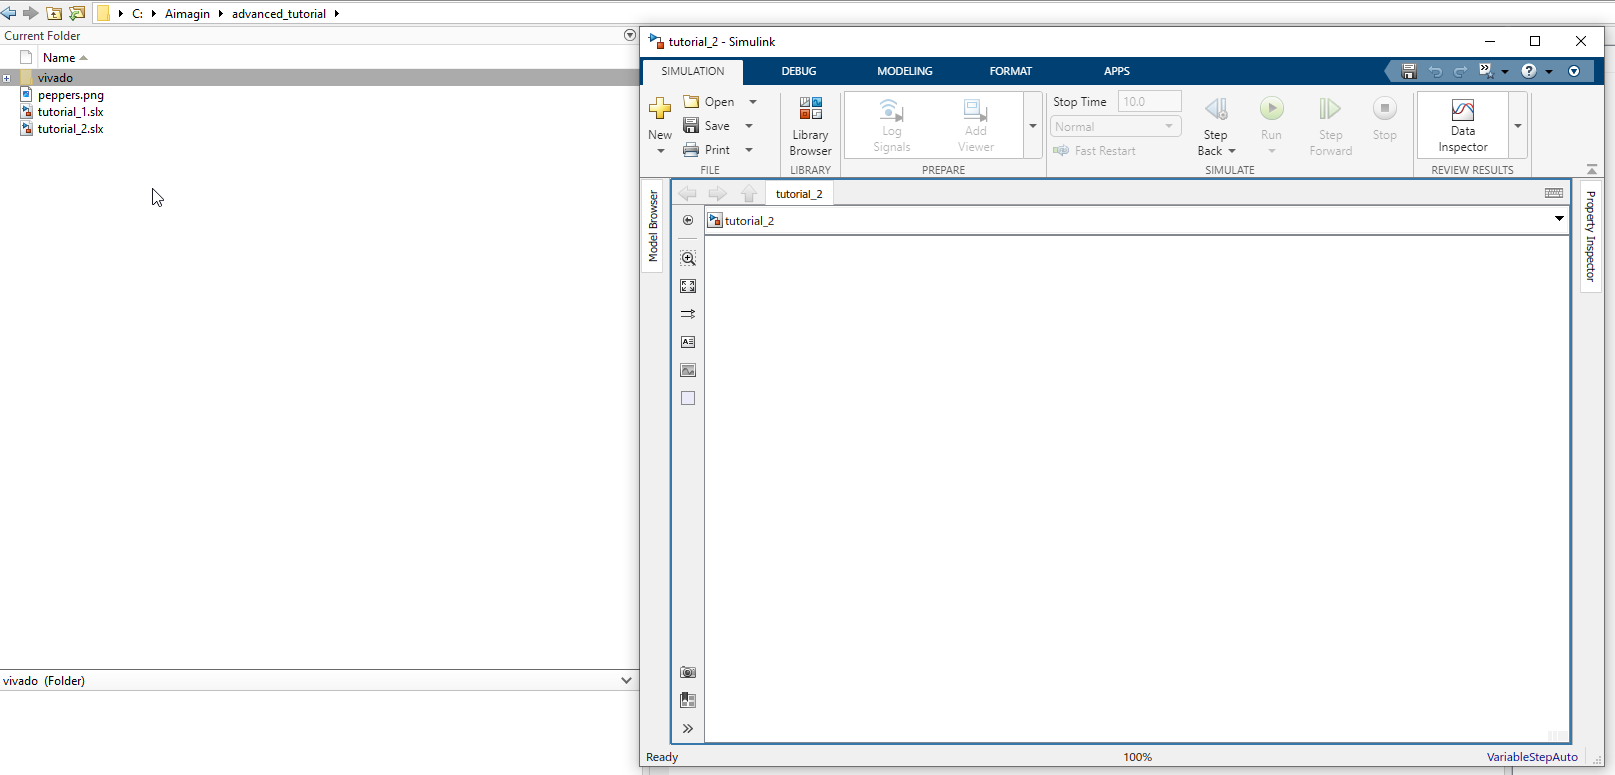
1.Open Matlab and change the current folder to the folder that you want to create the project. Then open Simulink, create a blank model and save it with a proper name (without any spaces)
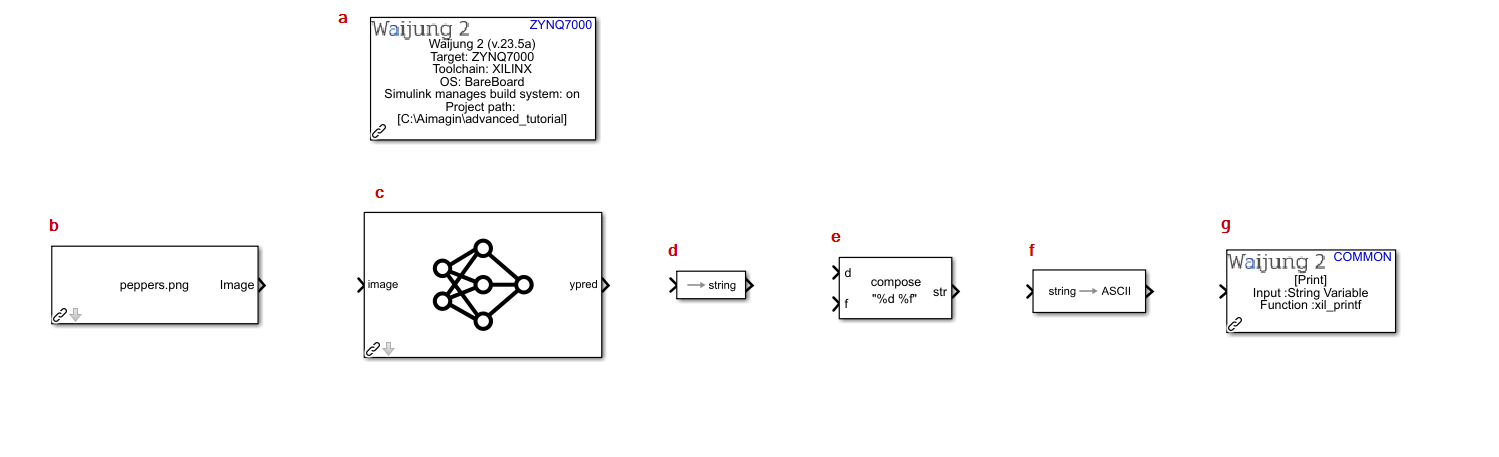
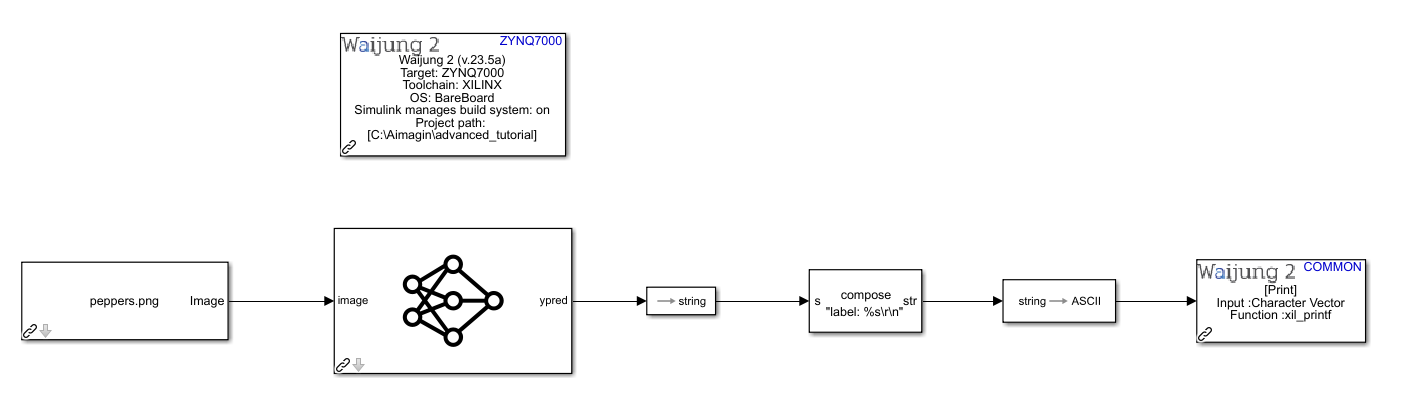
2.Import following blocks to the blank model
a.Waijung 2 Target Setup block
b.Image From File block from Computer Vision Toolbox
c.Image Classifier block from Deep Learning Toolbox
3.Modify following mask parameters of each block
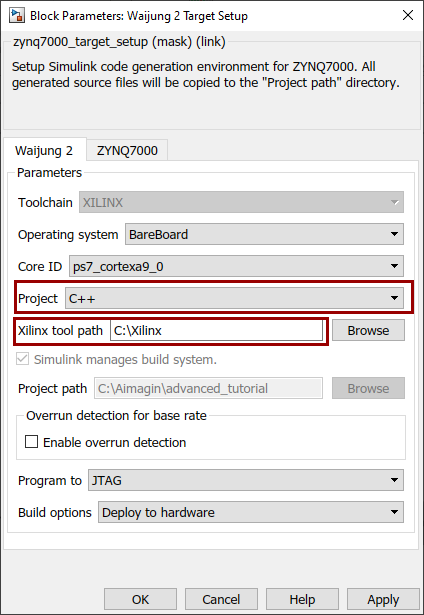
a.Waijung 2 Target Setup block
i.Waijung 2 tab
1.Project: C++
2.Xilinx tool path: Change the path according to your installed location of Xilinx tools
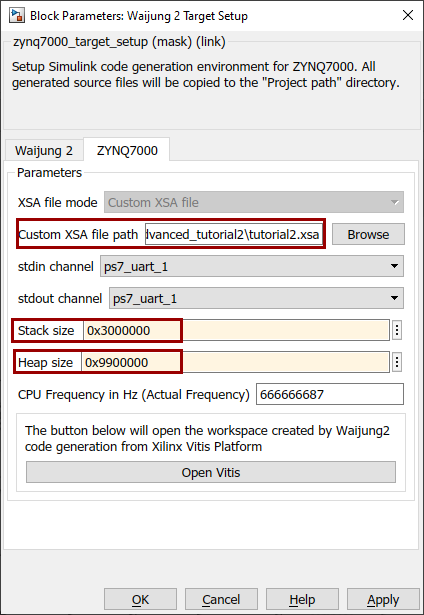
ii. ZYNQ7000 tab
1. Custom XSA file path: Location of the xsa file which you exported above using Vivado
2.Stack size: 0x3000000
3.Heap size: 0x9900000
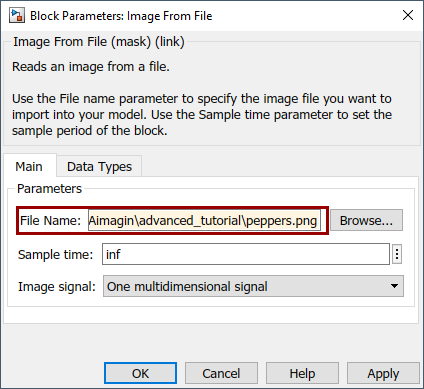
b.Image From File block
i.File Name: Browse the image that you downloaded from Tutorial 1
c.Image Classifier block
i.Network: Network from MATLAB function
ii.MATLAB function: mobilenetv2

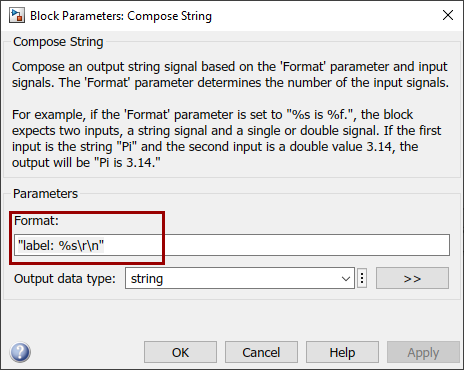
d.Compose String block
i.Format: "label: %s\r\n"
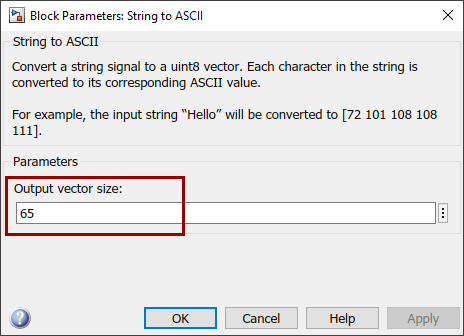
e.String to ASCII block
i.Output vector size: 64
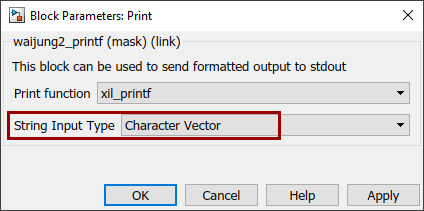
f.Print block
i.String Input Type: Character Vector
4.Connect the blocks together as follows and save the Simulink model
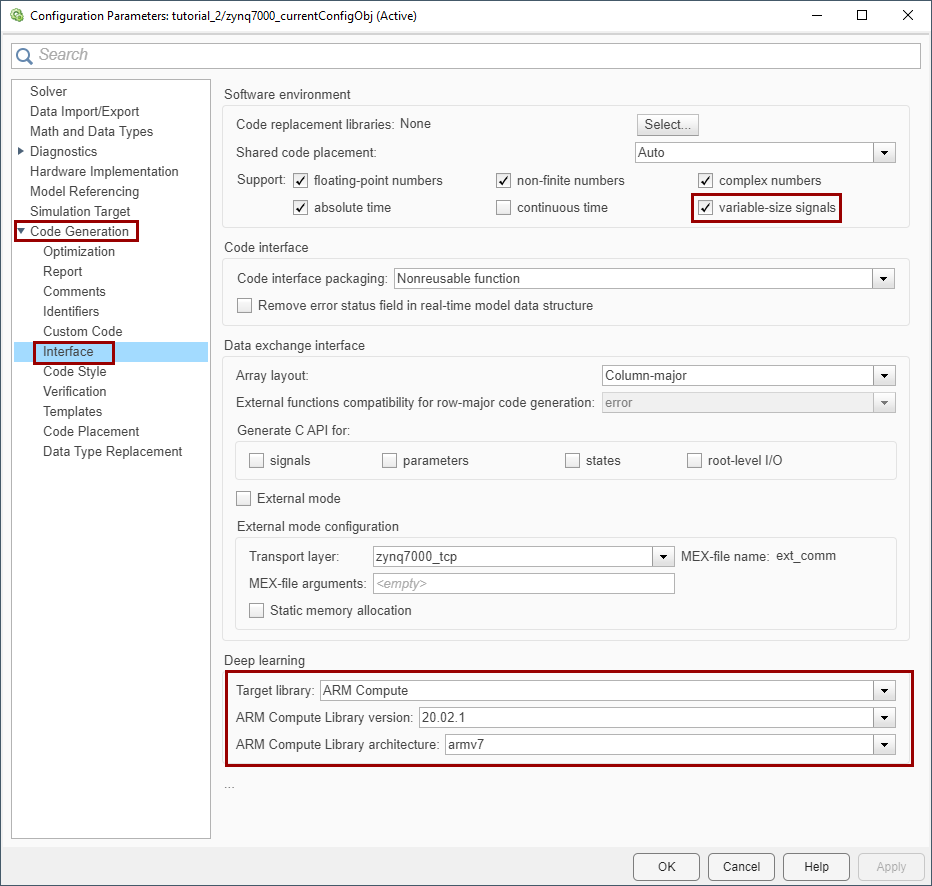
5.Change the following Model Configuration parameters (goto MODELING tab → Model Configuration parameters )which are related to the Image Classifier block
a.Code Generation → Interface → Deep learning
i.Target Library: ARM Compute
ii.ARM Compute Library version: 20.02.1
iii.ARM Compute Library architecture: armv7
b.Code Generation → Interface → Software environment
i.variable-size signals: Enable
6.Save the Simulink model. Then go to APPS → Embedded Coder. To build the Simulink model go to C CODE → Build. Then connect the Zybo 7z20 board to the computer using the USB cable and turn on the board


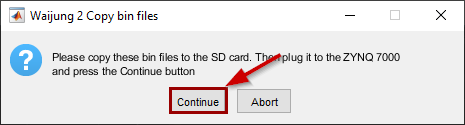
7.While the Simulink model is building, a dialog box will be popped up asking to copy the bin files from the opened folder to the SD card
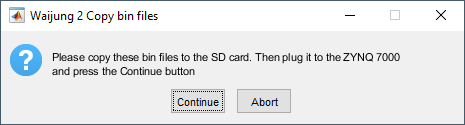
8.First, plug the micro SD card to the Computer and copy all the .bin files from the opened folder. A folder will be opened automatically when the above dialog box is popped up
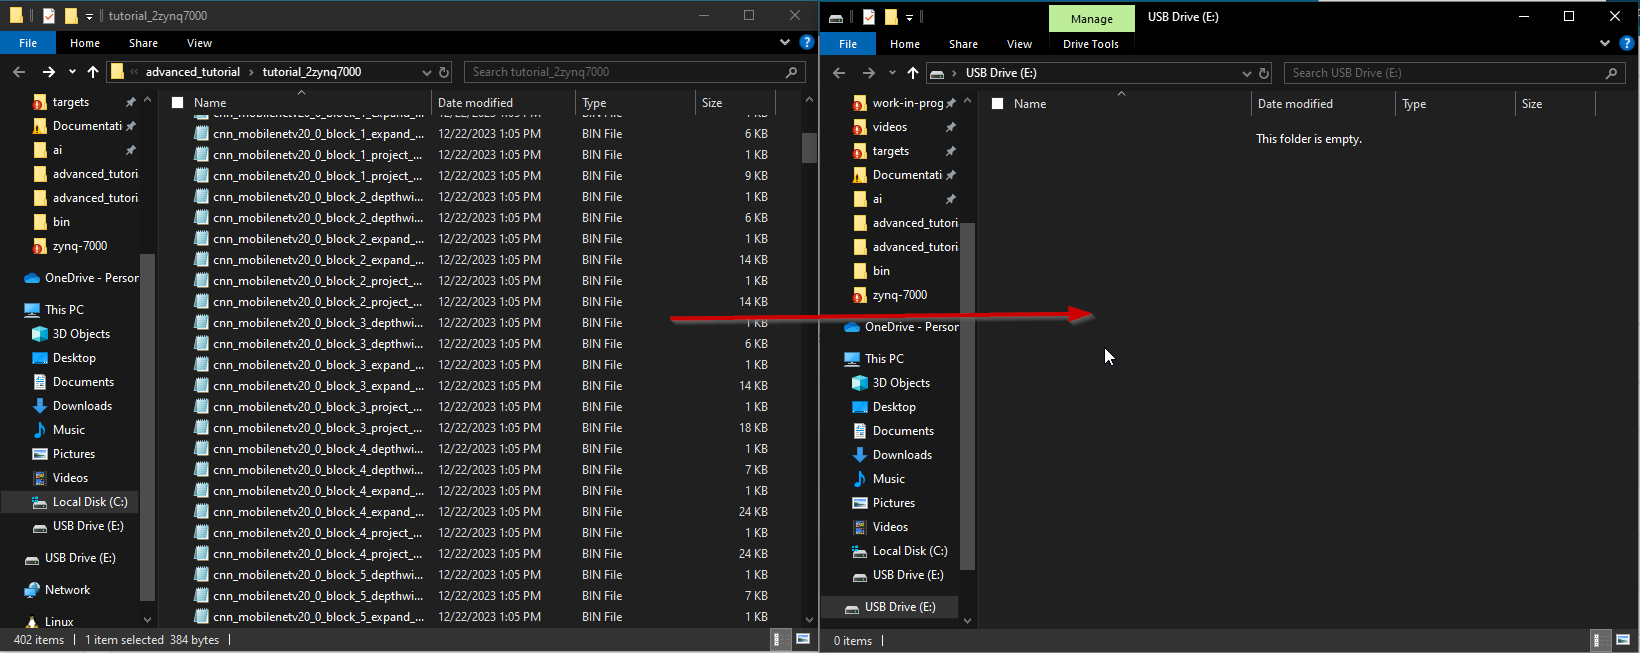
9.After all the .bin files are copied, plug the SD card to the Zybo 7z20 board and press Continue to the above dialog box so that it will continue the build process
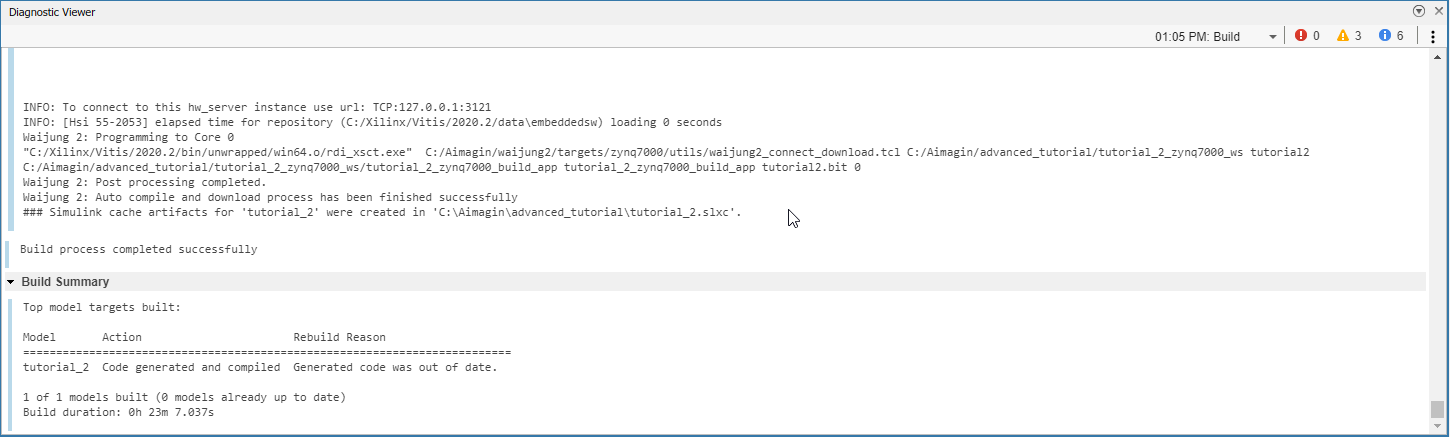
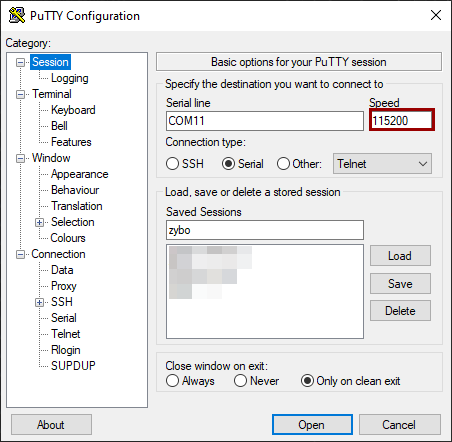
10.After the build process is successfully finished. Open the Serial Monitor with the correct COM port and set the Baudrate to 115200
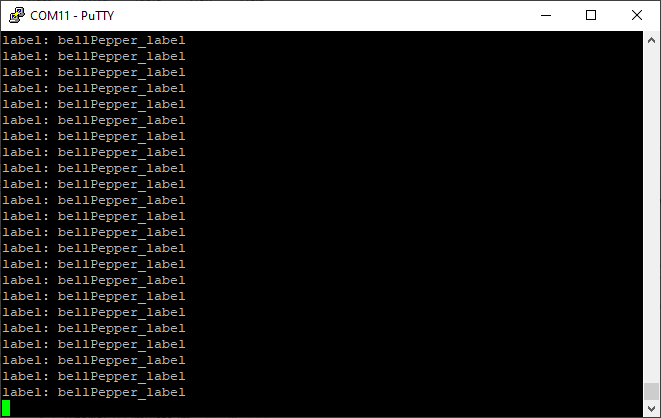
11.As the result, it will output the most accurate label name according to the input image. Here we input a image with peppers. So it outputs the bellPepper_label as the result to the input image same as in the tutorial 1
Resources
Simulink model: tutorial_2.slx
XSA file: tutorial2.xsa
Vivado project: advanced_tutorial2.zip