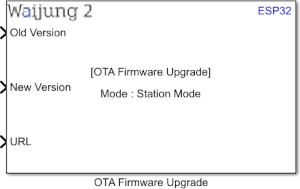
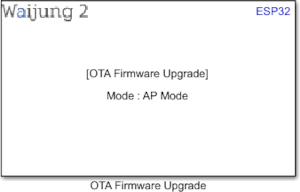
How this block appears in a Simulink model?
What can be configured?
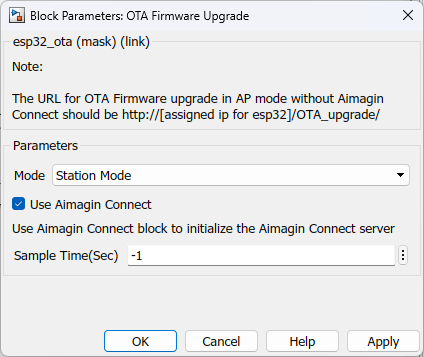
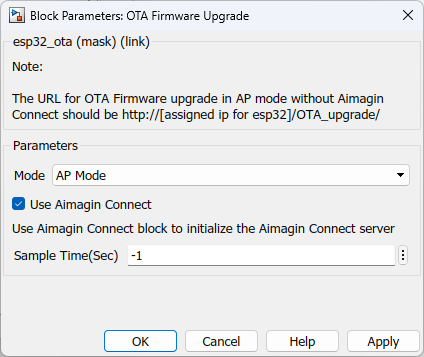
Configuration Parameter |
Selectable Option/Value |
Description |
Mode |
AP--Station |
Allow user to select OTA Firmware upgrade mode. |
Use Aimagin Connect |
Check-Uncheck |
Allow user to upgrade firmware using Aimagin connect |
Sample time (sec) |
-1 (inherited) or specify |
Specify sample time of the block |
When to use this block?
This block is used to upgrade firmware over the air (Wifi).
How does this block work?
This block requires WiFi Block to function. Depending on the WiFi configuration (AP or STA), ‘Mode’ in this block should be set. In Station mode, the user can input the direct download URL of the update file saved in any server (Example: Google Drive).
In the AP mode, the file can be uploaded from the client’s device. The client tries to access the web server default web page will be prompted where the user can upload the update file from the host device.
The URL is: http://[ assigned IP for esp32 ]/OTA_upgrade/
Demo
OTA AP demo
Upgrade #1 Demo file : esp32_ota_ap_demo1.slx
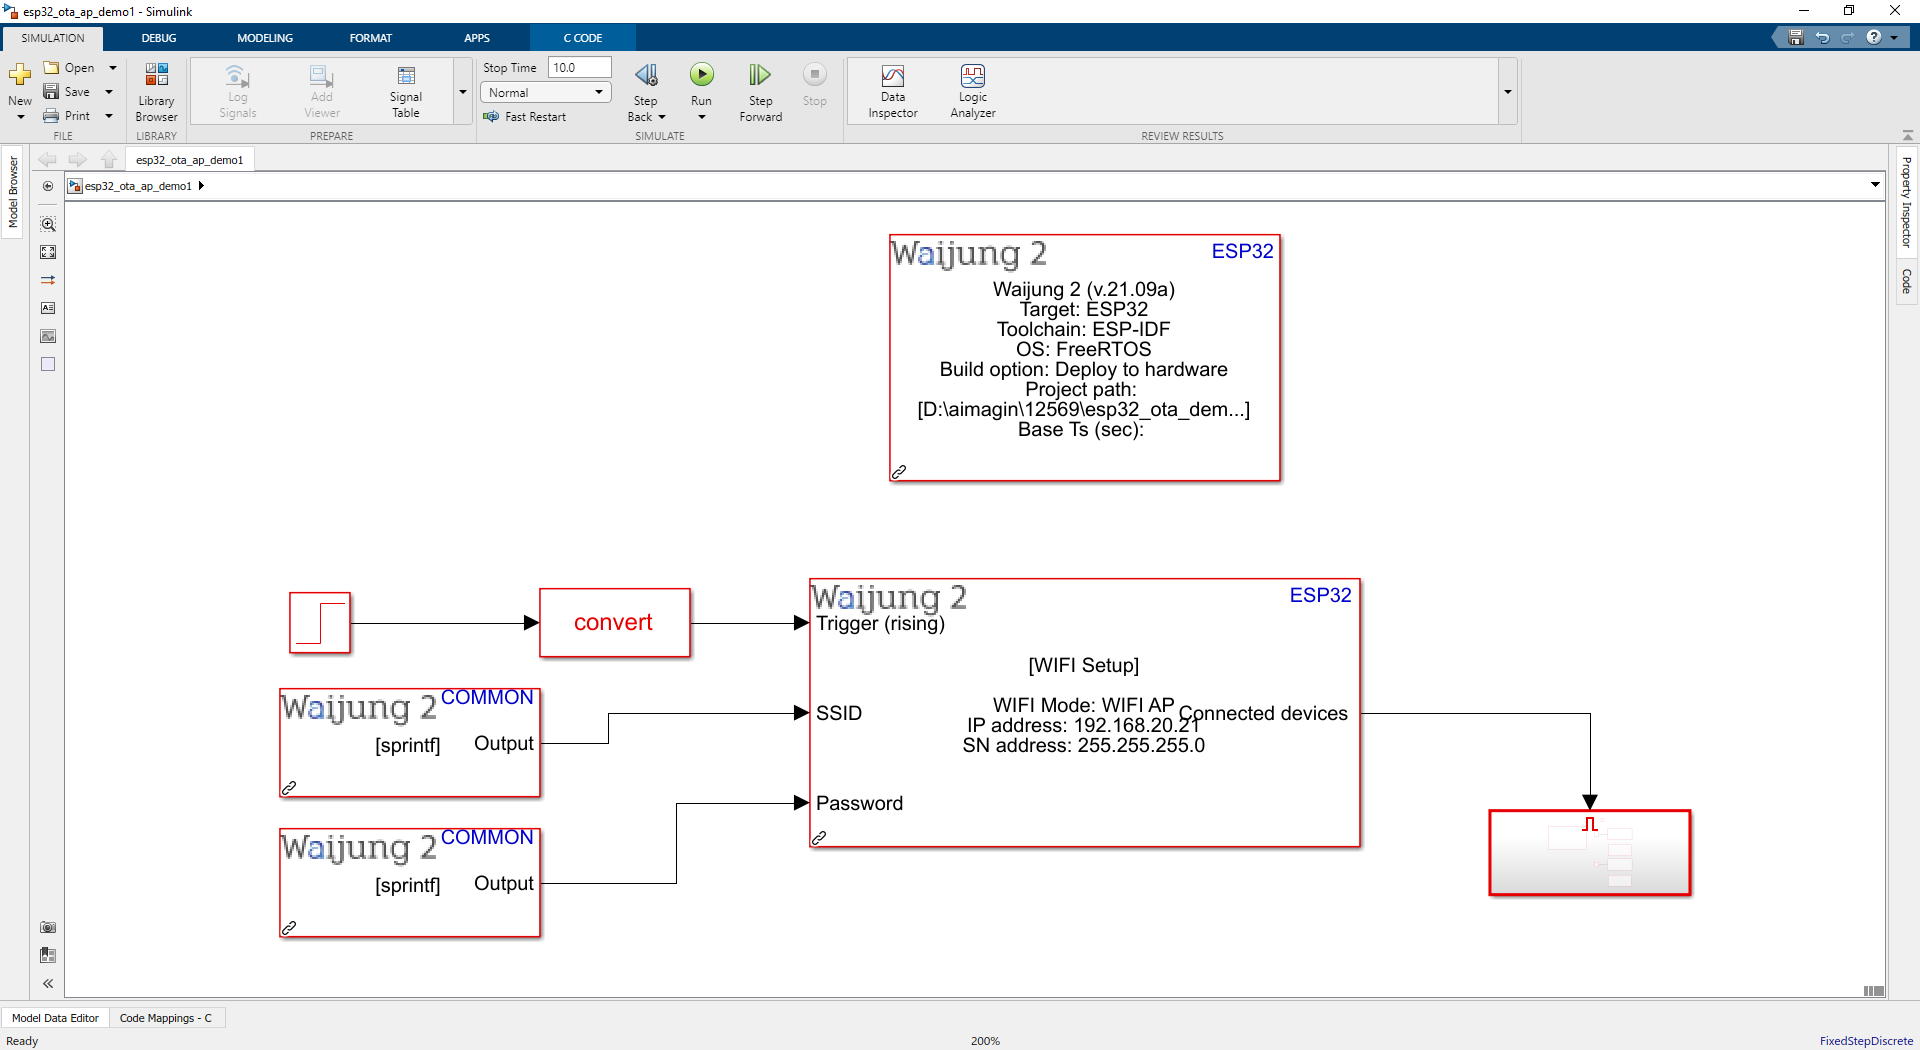
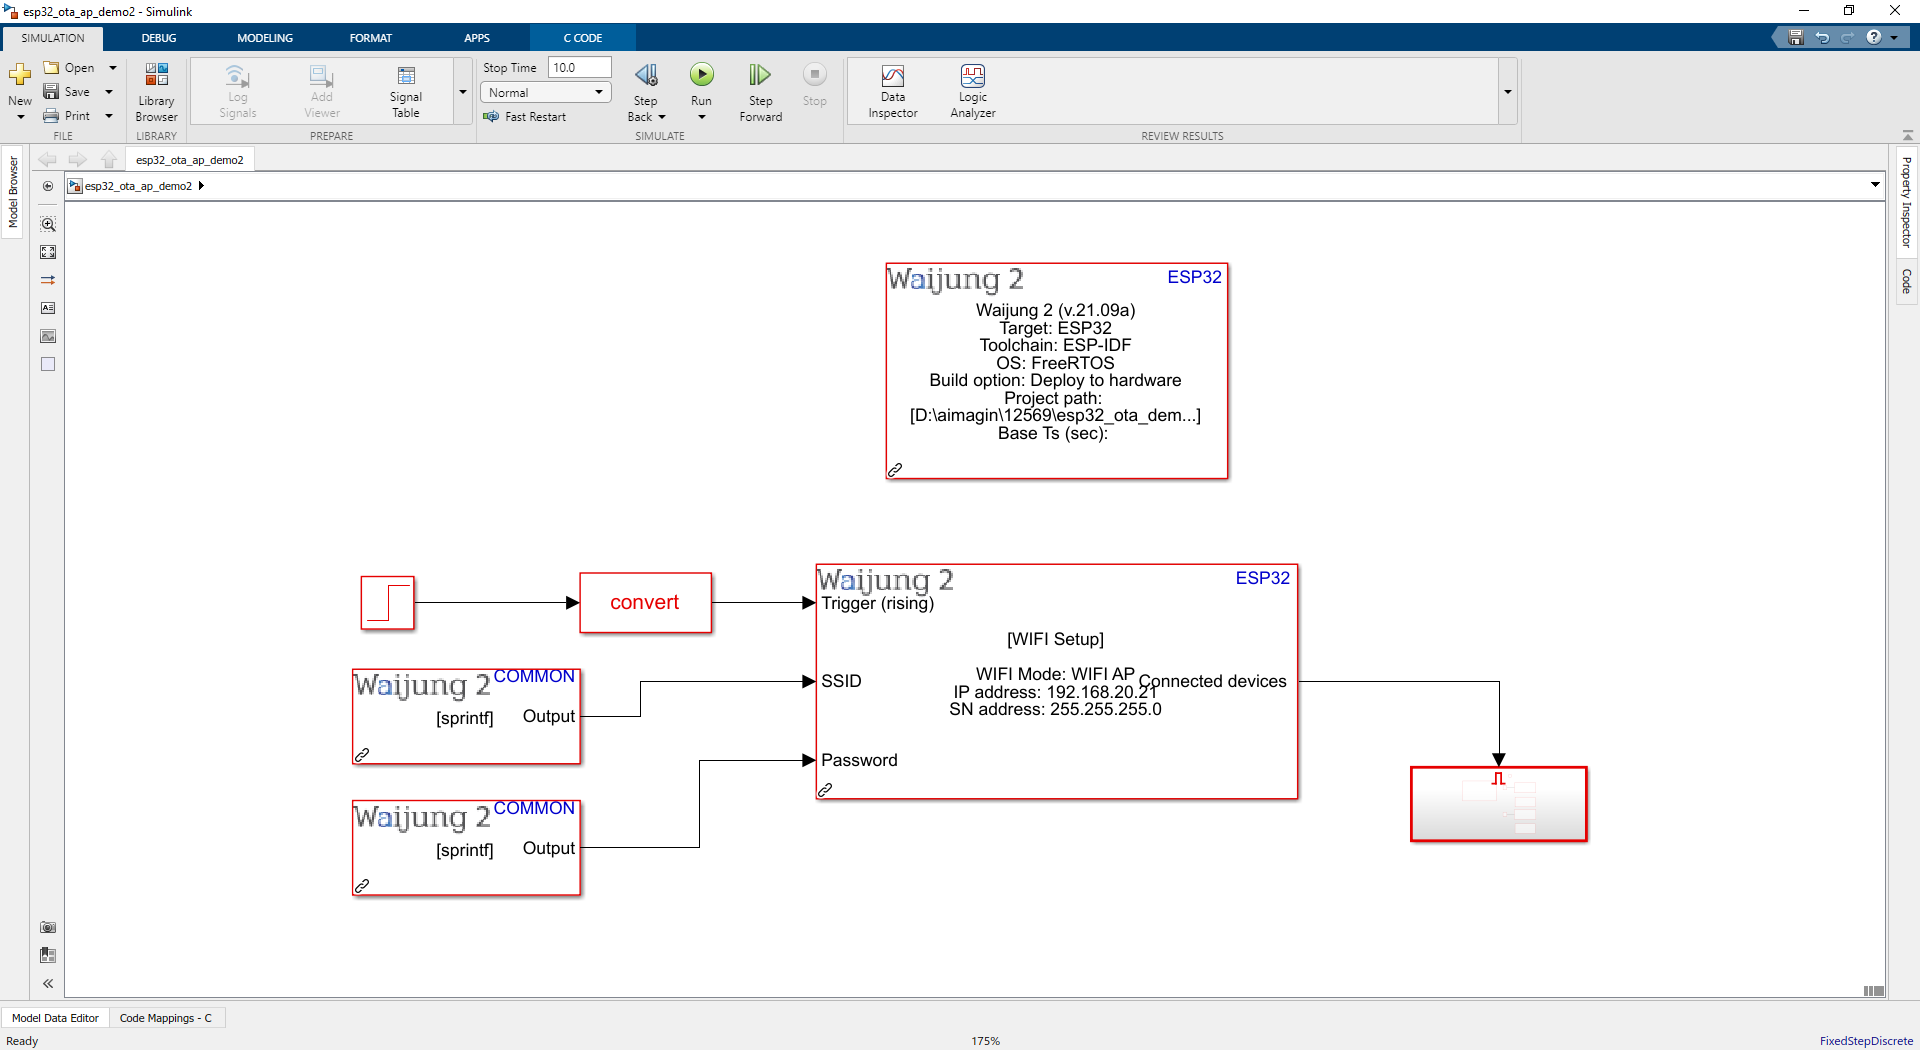
Upgrade #2 Demo file : esp32_ota_ap_demo2.slx
Description
This OTA AP demo is used to upgrade the firmware in AP mode using OTA firmware upgrade block. Upgrade #1 and Upgrade #2 consist of the same configuration, the only difference is LED blinking frequency.
Hardware Setup
1.ESP32 module
2.LED
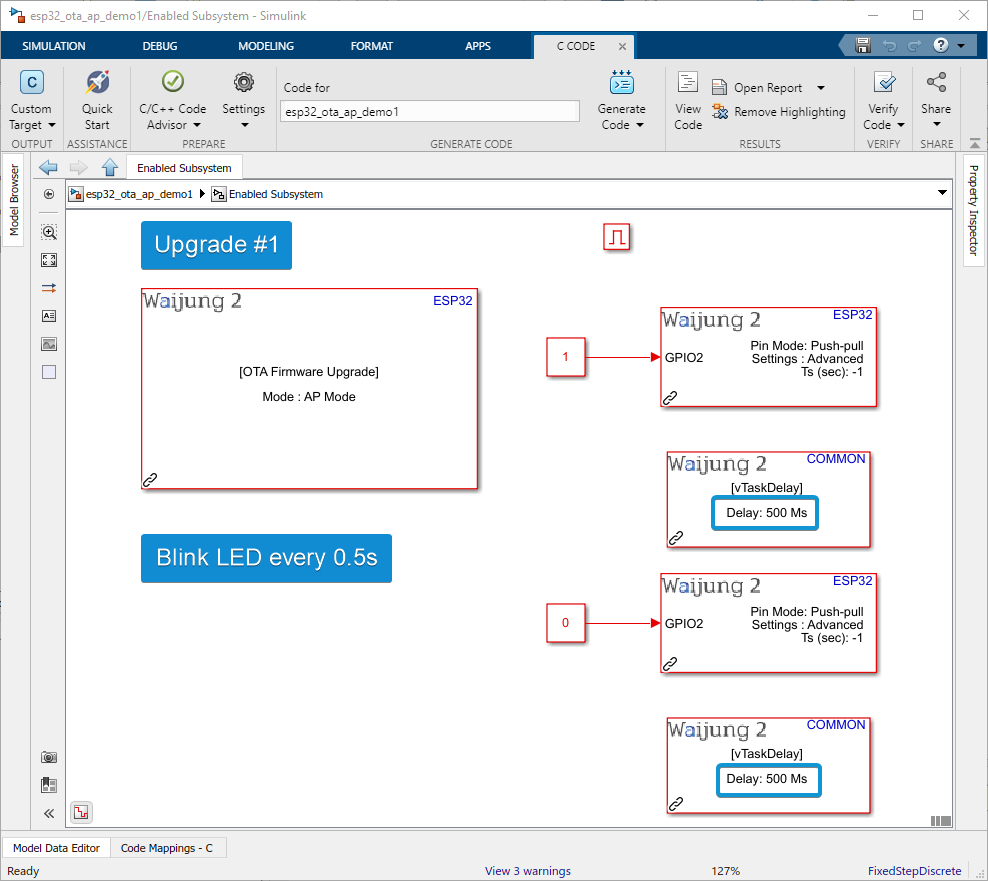
Connect LED to GPIO2
Note: In some boards (eg. ESP32 DEVKIT V1) GPIO2 is already connected to the onboard LED. Depending on the board user may need to connect an LED to GPIO2 to observe the LED output.
Software Setup
1.Flash the Upgrade #2 Demo file : esp32_ota_ap_demo2.slx into the ESP32 (Just to generate the waijung2_esp32.bin file for the Upgrade #2).
2.Flash the Upgrade #1 Demo file : esp32_ota_ap_demo1.slx into the ESP32.
3.Connected to the ESP32 Wifi (SSID:esp32_wifiap Password:12345678)
4.Go to folowing URL: http://192.168.20.21/OTA_upgrade/ (http://[ assigned IP for esp32 ]/OTA_upgrade/)
5.Click Browse and Select the following file [demo file location]\esp32_ota_ap_demo2_esp32_build_system\build\waijung2_esp32.bin
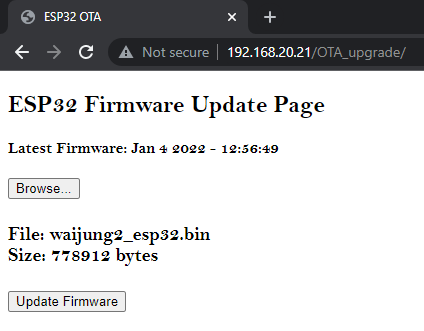
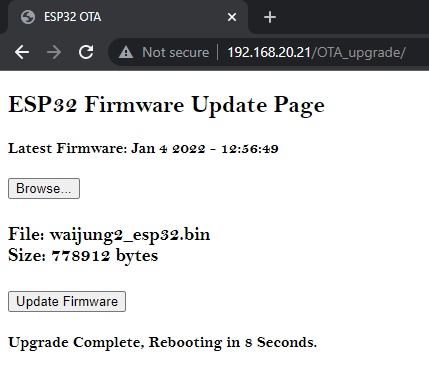
6.Click Update Firmware
What should be happening?
Upgrade #1 will make LED blink every 0.5s when a device connects to the ESP32 wifi.
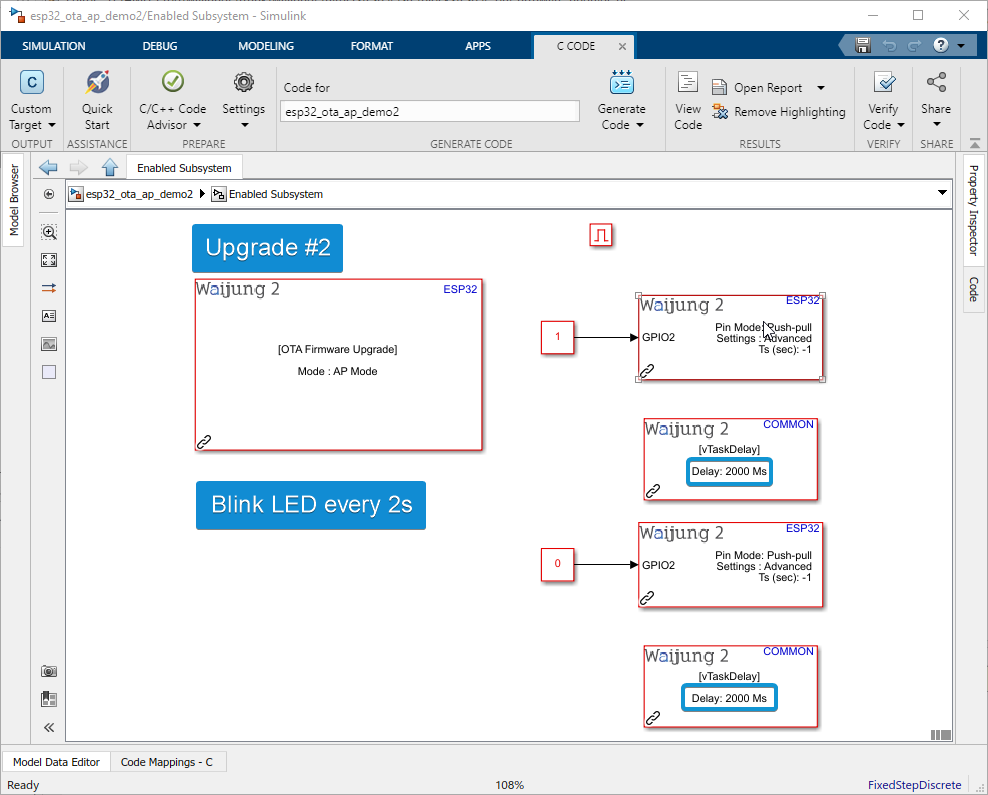
After the completion of the upgrade Upgrade #2 will make LED blink every 2s.
Switch between Upgrade #1 and #2 by selecting and updating firmware with the generated waijung2_esp32.bin for each demo file using the same URL: http://192.168.20.21/OTA_upgrade/.
OTA STA demo
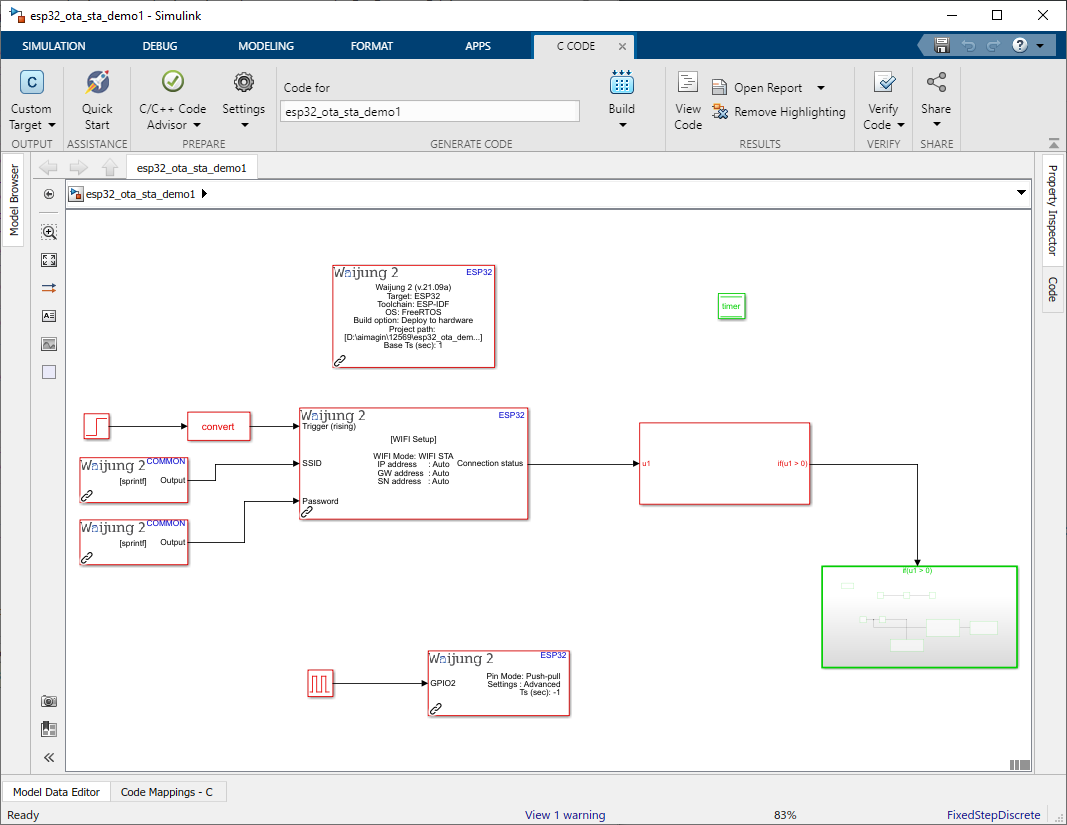
Upgrade #1 Demo file : esp32_ota_sta_demo1.slx
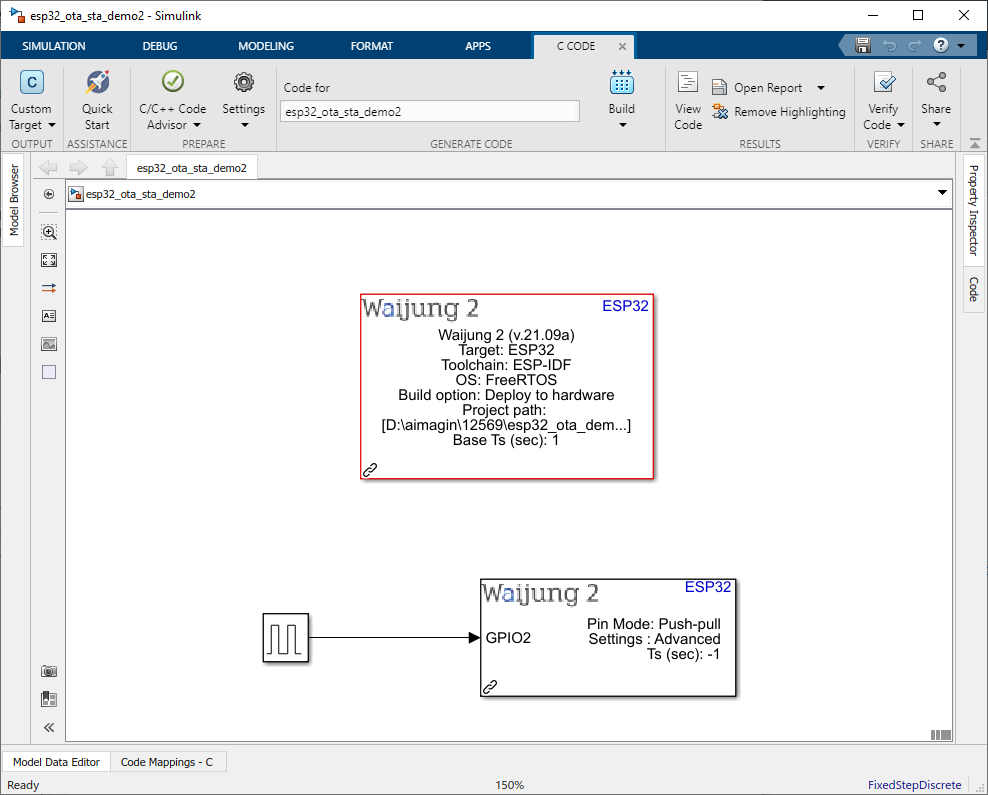
Upgrade #2 Demo file : esp32_ota_sta_demo2.slx
Description
This OTA STA demo is used to upgrade the firmware in STA mode using OTA firmware upgrade block. Upgrade #1 consists of WIFI block to initiate wifi in STA mode, OTA firmware upgrade block to upgrade the firmware, and Digital output block to indicate visually difference between Upgrade#1 and #2. Upgrade #2 consist of only a Digital output block with different LED blinking frequency.
1.Flash the Upgrade #2 Demo file : esp32_ota_sta_demo2.slx into the ESP32 (Just to generate the waijung2_esp32.bin file for the Upgrade #2).
2.Go to [demo file built location]\esp32_ota_sta_demo2_esp32_build_system\build\ and select waijung2_esp32.bin file.
3.Open Google Drive and upload the waijung2_esp32.bin file.
4.Create a shareable link for the waijung2_esp32.bin and make it anyone with the link can access it as an editor.
5.Copy the shareable link into the https://sites.google.com/site/gdocs2direct/ to get a direct downloadable link for the waijung2_esp32.bin.
6.Enter the direct downloadable link for the waijung2_esp32.bin in the URL input port of the OTA firmware upgrade block (in Upgrade #1 Demo file: esp32_ota_sta_demo1.slx).
7.Enter SSID and Password for the wifi in Upgrade #1 Demo file : esp32_ota_sta_demo1.slx.
8.Flash the Upgrade #1 Demo file : esp32_ota_sta_demo1.slx into the ESP32.
What should be happening?
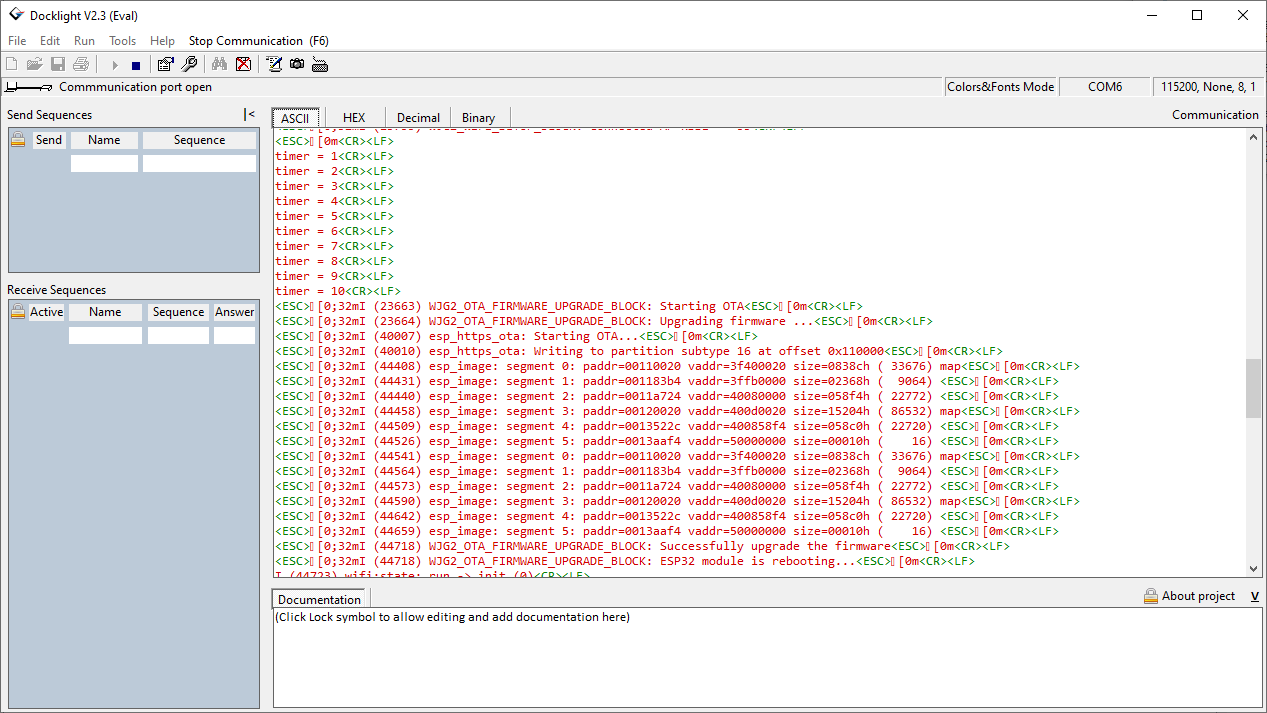
After ESP32 connects to the Wifi, Upgrade #1 will make LED blink every 0.5s for 10s. After that, it will start the OTA upgrading as shown in the following image. Use a serial monitor and select the corresponding COM port and the baud rate of 115200 to connect with ESP32 and monitor the progress.
After the completion of the upgrade Upgrade #2 will make LED blink every 2s.