Introduction
This tutorial will demonstrate how to log a LDR sensor's data to ThingSpeak using Waijung 2 blockset.
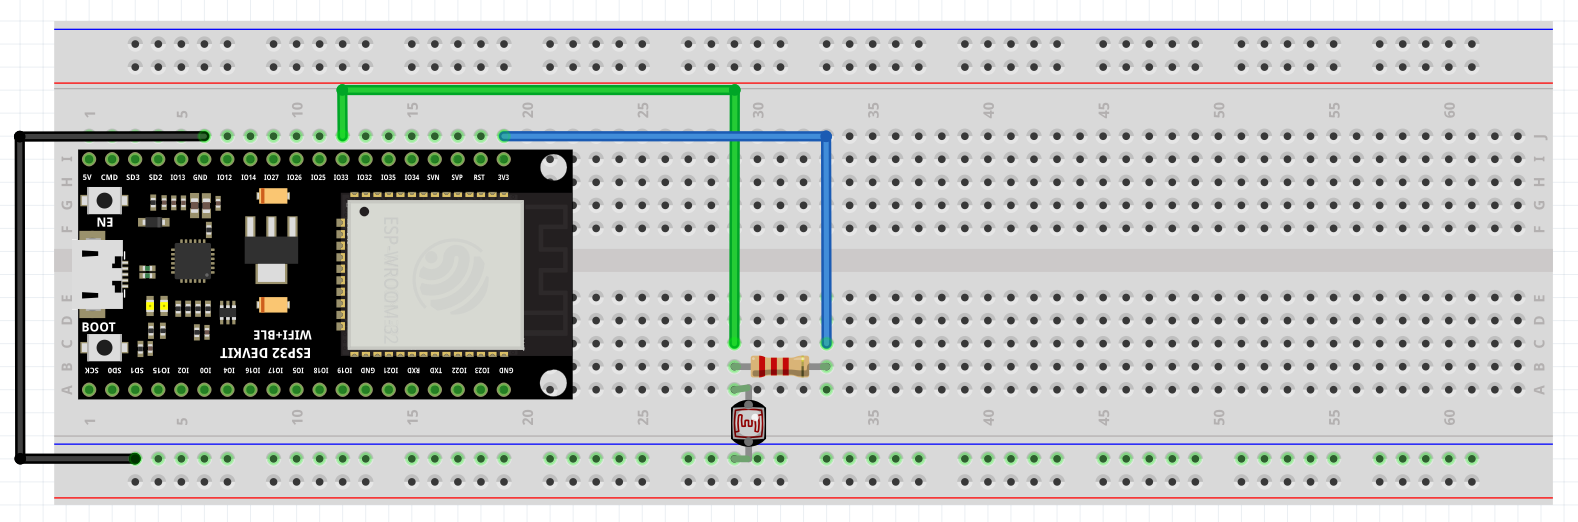
Required hardware and setup
No. |
Item |
Picture |
Quantity |
1 |
ESP32 with USB cable |
|
1 |
2 |
Protoboard (830 points) |
|
1 |
3 |
Jumper Wire Male-Male |
|
3 |
6 |
Resistor 2k Ohms |
|
1 |
7 |
LDR sensor |
 |
1 |


Points to note
In a project like this, the ESP32 needs to connect to the ThingSpeak server via an access point. This is done so that the ESP32 can send whatever data it receives from the devices connected to it (in this case it is going to be a LDR sensor) to the specified server.
A device uses Station Mode to join a network that already exists. Your phone is running in Station Mode when it connects to your WiFi network at home.
Likewise, the ESP32 will be running in Station Mode to send data to the ThingSpeak server via WiFi
Import the Waijung 2 Target Setup block and set up the WiFi Station Mode by using the SSID and password that your computer uses to connect to the internet. The point of having an Enabled Subsystem is that the content inside it will only execute if the WiFi connection status is a success.
Note: All ESP32 boards supports 2.4GHz bandwidth (except the recently released ESP32-C5 which also supports 5GHz), so make sure the WiFi you connect your ESP32 board to lies in the 2.4GHz frequency range
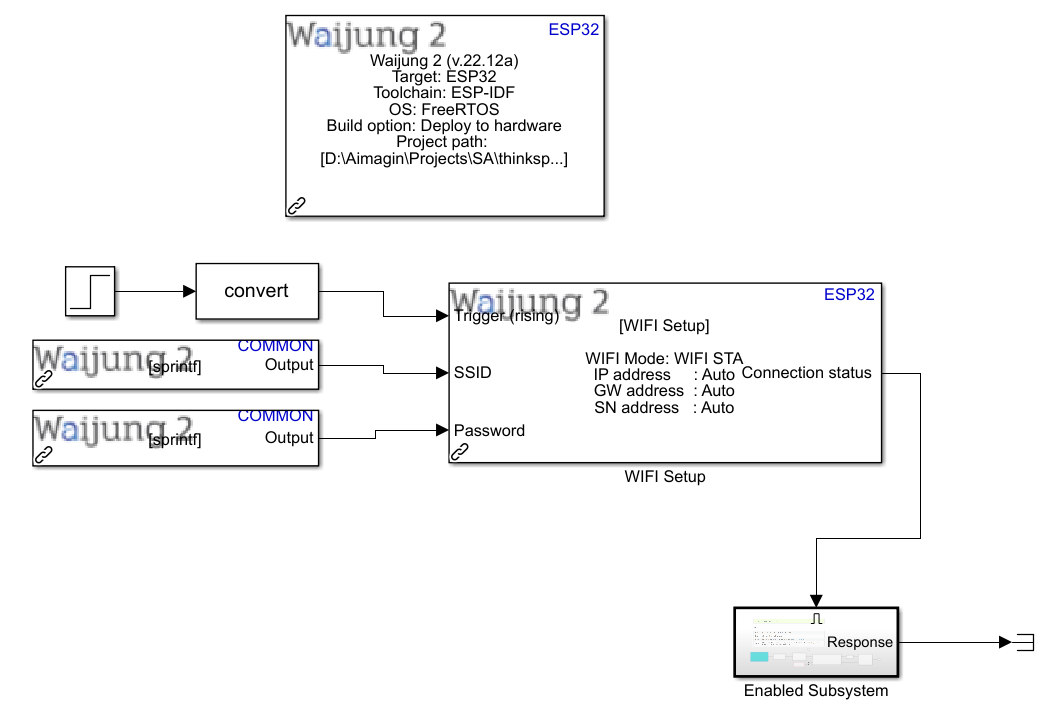
Inside the Enabled Subsystem:
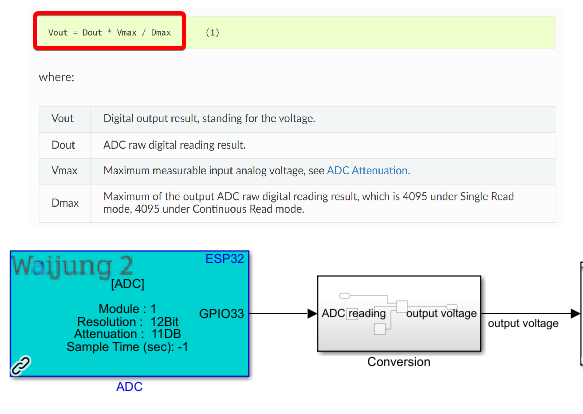
1.Import the Waijung 2 ADC block to detect the analog values from the LDR sensor. In this example, ADC resolution is selected as 12 bits. This is because our preference for the maximum ADC raw reading result is 4095. ADC attenuation is selected as 11dB as higher input voltages can be measured with higher attenuation setting.
2.Convert those values to output voltage readings to better understand the change in voltage consumption of the LDR (out of 3.3V) in different situations. For example, in a very dark surrounding, LDR resistance will be extremely high in comparison to the resistance of other components in the circuit. This will cause it to consume a significant portion of the 3.3V, and sometimes the entire 3.3V.
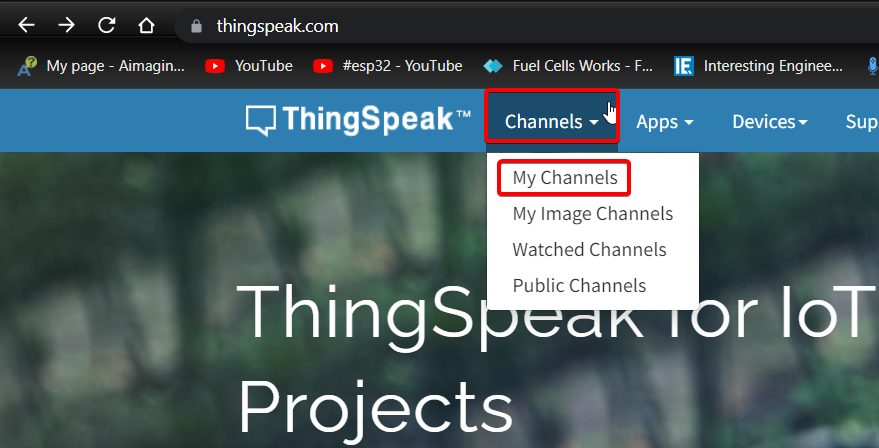
3.Go to https://thingspeak.com/ and create an account if you don't have one
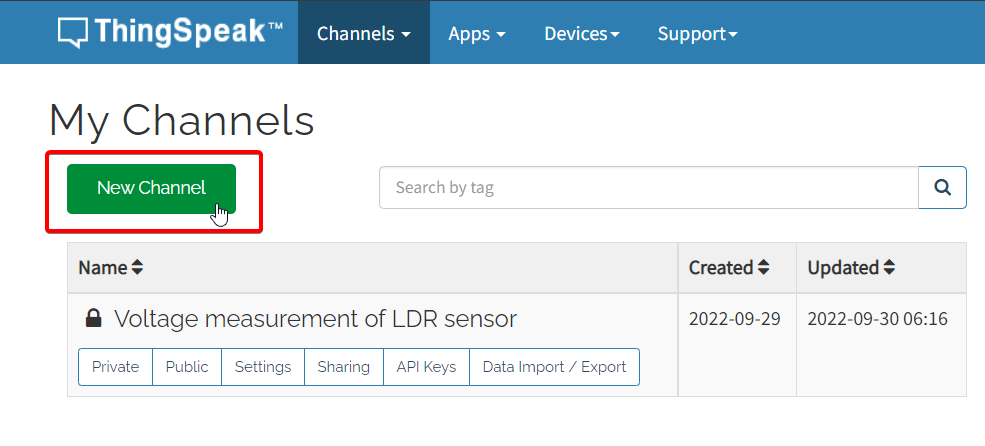
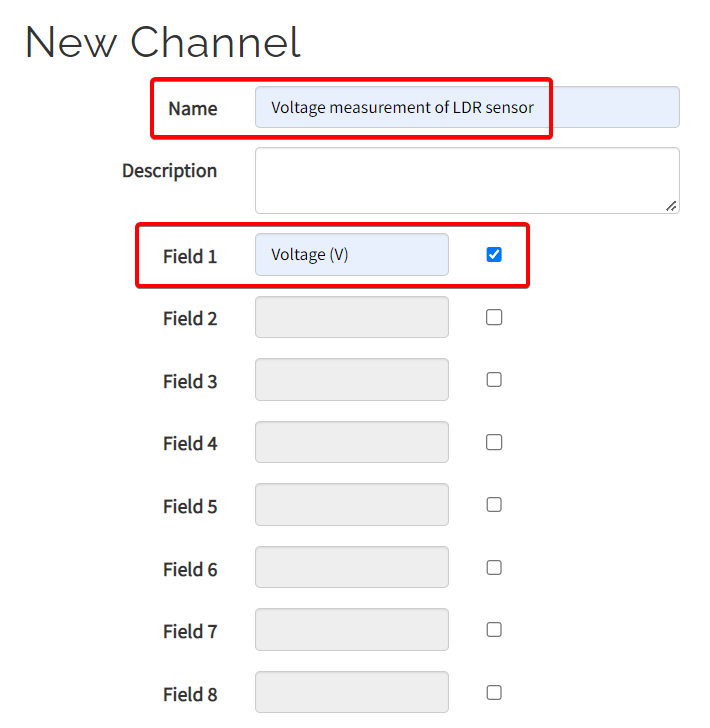
4.Follow the steps below to create your channel
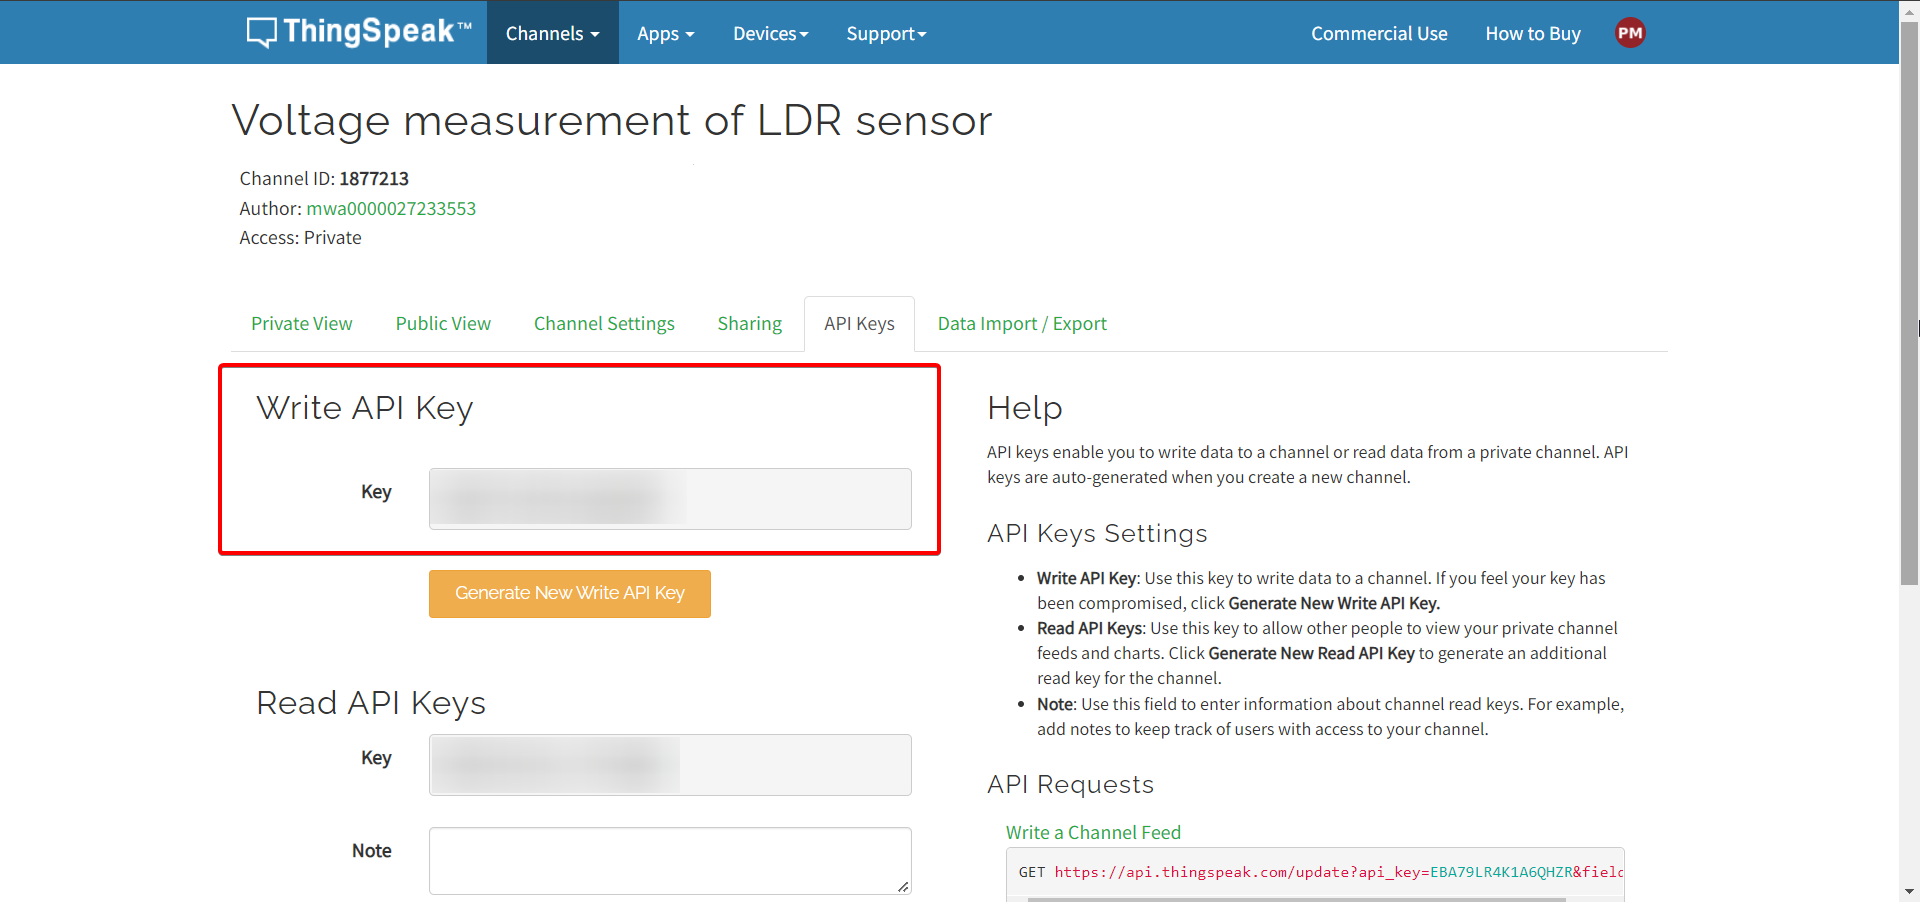
5.Since we are trying to write data to the ThingSpeak server, extract the Write API Key. Through this key you will be able to directly send data from the ESP32 to the server. You may add more widgets of your choice too.

6.Using this documentation as reference to post data to ThingSpeak, we know that:

Refer back to Step 4 and notice that we have chosen "Field 1" for Voltage. Copy the URL as shown in the image in Step 6, replace your Write API Key in the designated area and change from "field6" to "field1". Now paste the completed URL in your browser. It will look something like this:

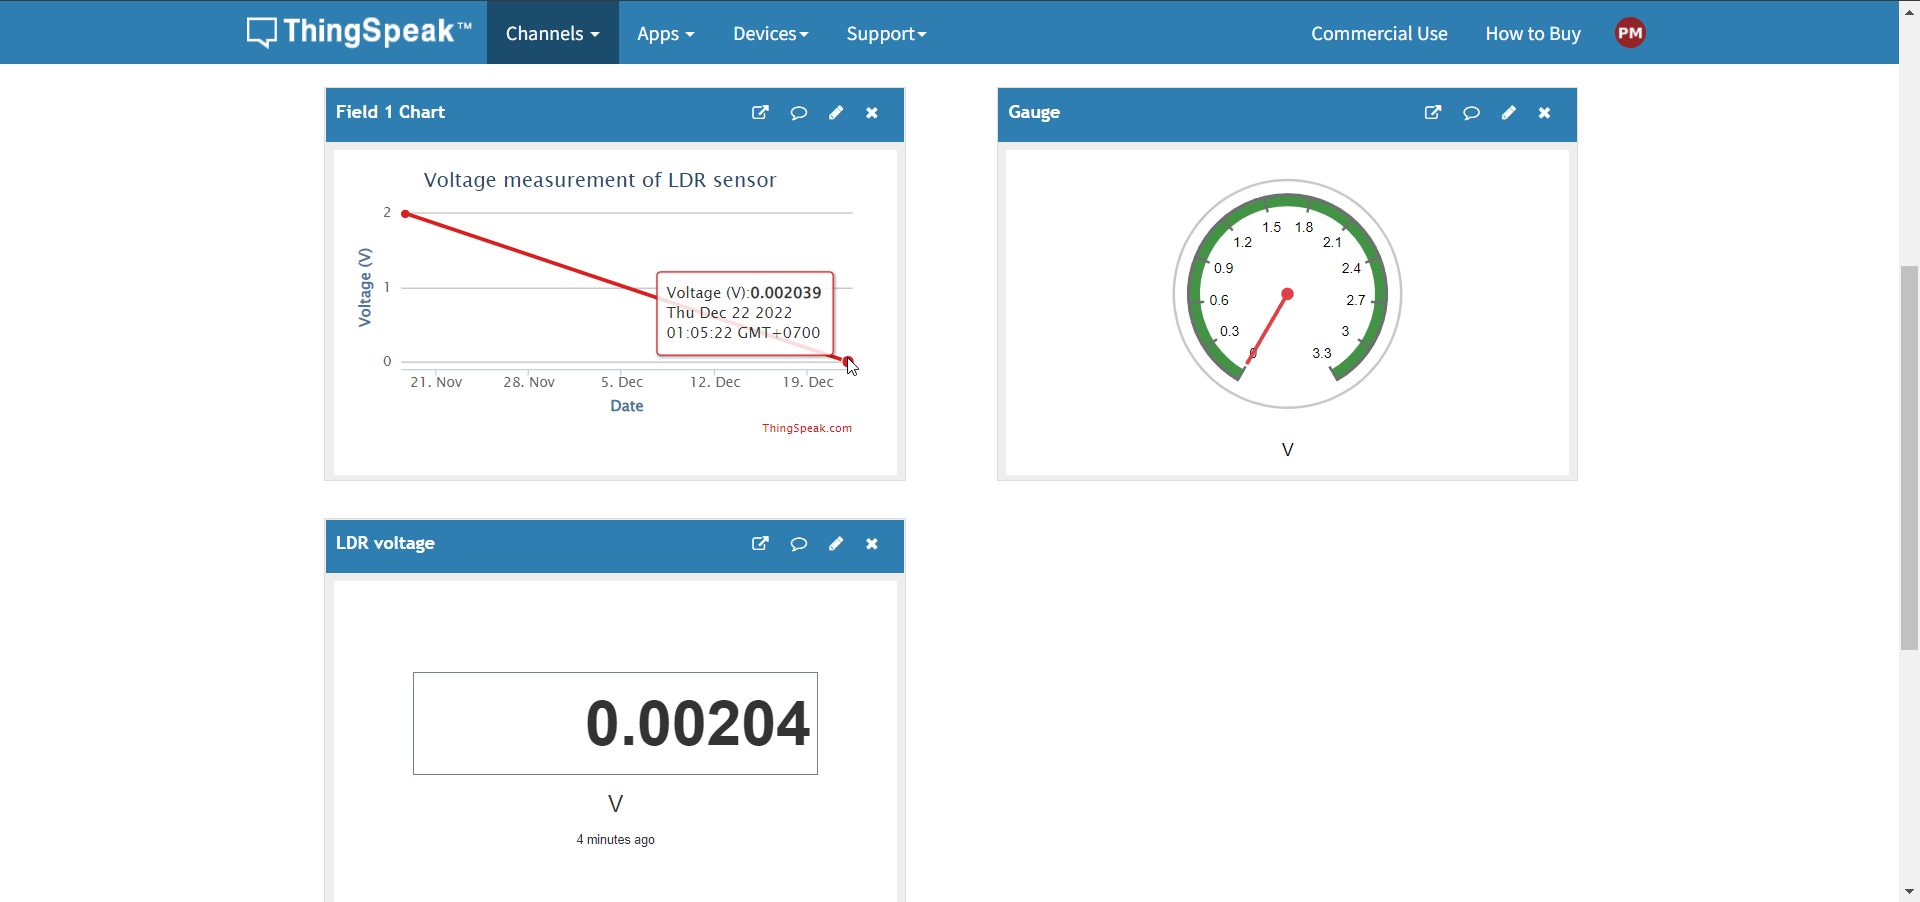
7.Go back to your channel and you will now see that your "field1" value, which is 0.002039, is being displayed on your widget(s)
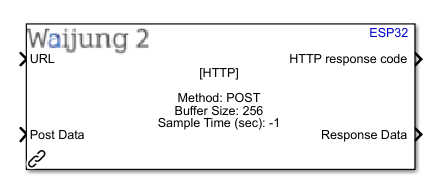
8.After ensuring that it works, go back to your Simulink model, import the HTTP Client block, and select the POST Method. We will set up the ESP32 as a client, receive information from the sensor and send it to the ThingSpeak server through a POST request.
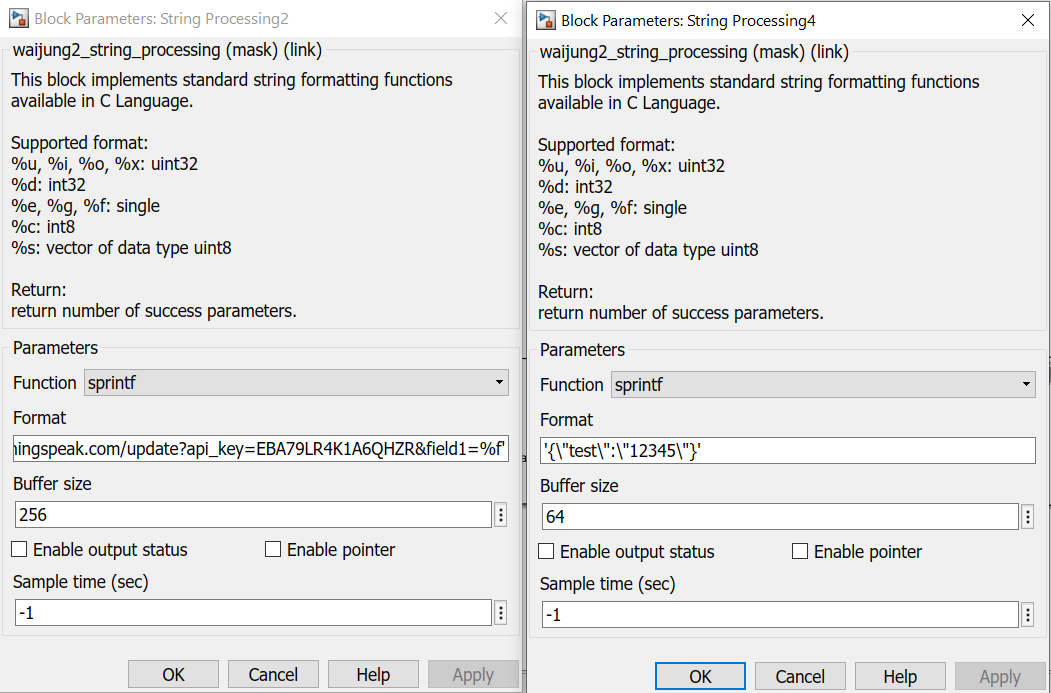
9.Use String Processing blocks to send data to the "URL" and "Post Data" inputs. Replace the field1 value with a "%f" to be filled in by the output voltage reading. Since we are sending all the needed data through the "URL" input of the HTTP Client block, the "Post Data" input can be a dummy string.
10. The outputs from the HTTP Client block i.e. HTTP Response code and Response data are not needed so they can be terminated using a "terminator" Simulink element.
11. Go to APPS tab > Embedded Coder > C CODE > Build
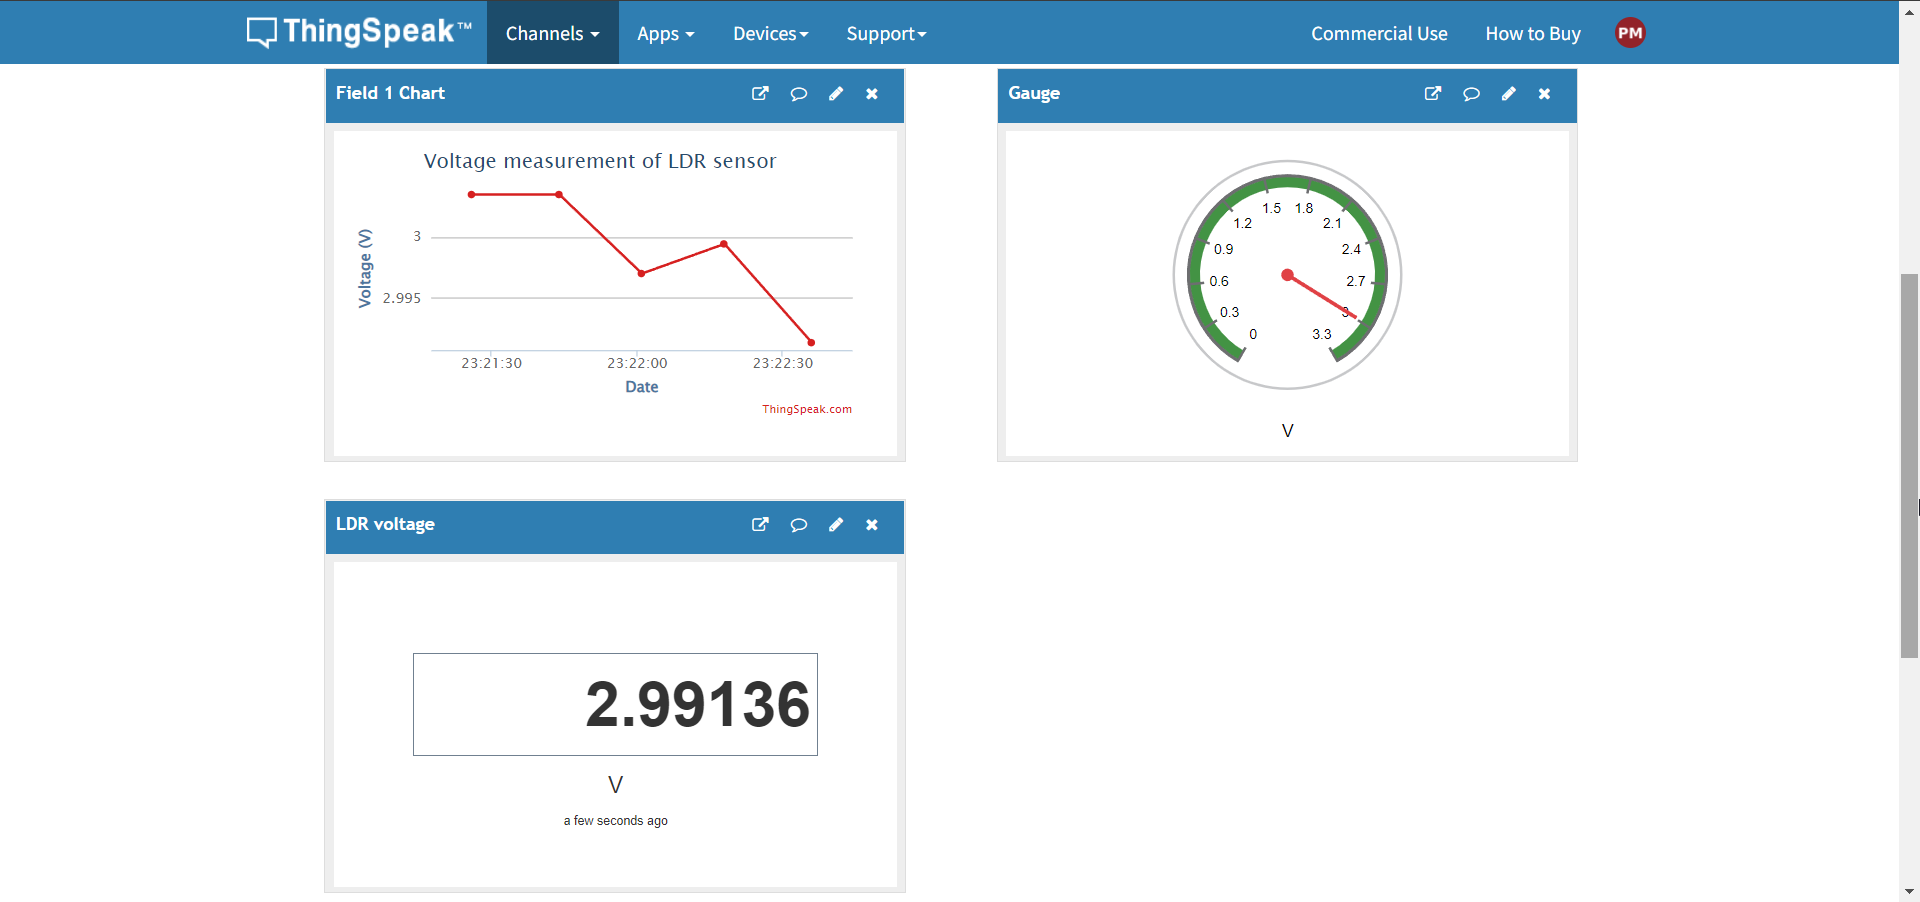
12. Once build is successful, go to your ThingSpeak channel. You will see the values being updated on your imported widgets every 15 seconds. This buffer will exist if you are using the free version of ThingSpeak. For real-time data acquisition, you will need to upgrade to the licensed or the commercial version.
13.If you want to understand more about this tutorial, please watch our detailed explanation here
Project file: Data logging to ThingSpeak