Objective
This tutorial will demonstrate how to log data from ESP32 on a Google sheet using the Waijung2 block-set.
Setting up the Google Sheet as server
Step 1
Log in to your Google account and open a blank Google Spread Sheet.
Step 2
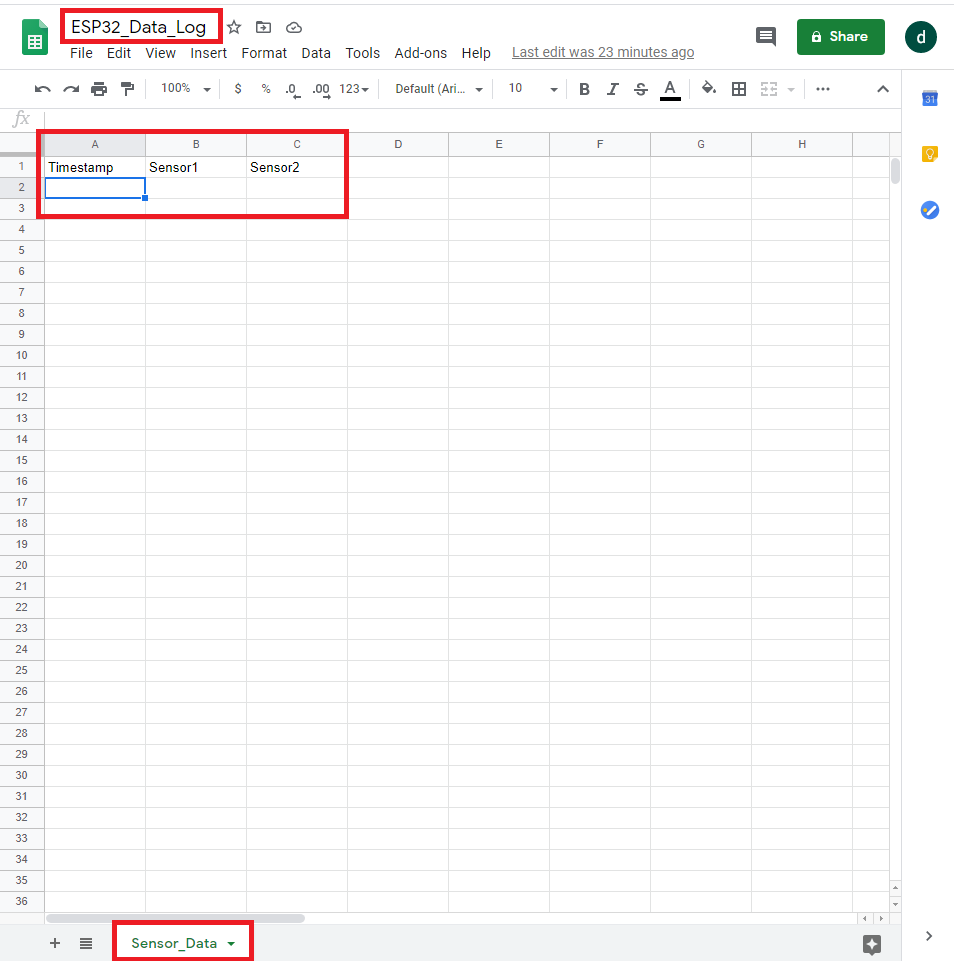
Change the document name and the sheet name as preferred and create the required columns. In this example:
•Document name: ESP32_Data_log
•Sheet name: Sensor_Data
•Columns: Timestamp, Sensor1, Sensor2
Step 3
Now the Google sheets needs to be published as a web application which will be listening to web requests. For that we use Google Script. Now go to Extensions -> App Script. This will open up a new window to write the script. Copy and paste the code in the g_script_code.txt file to the Google Script editor. Save the script with a preferred name. (Example: ESP32_Data_Log_Script).
Click here to find more information regarding Google Script.
Step 4
Go to Deploy -> New deploywent
Select deployment type as Web app.
In the pop-up window make the configurations as shown in the picture.
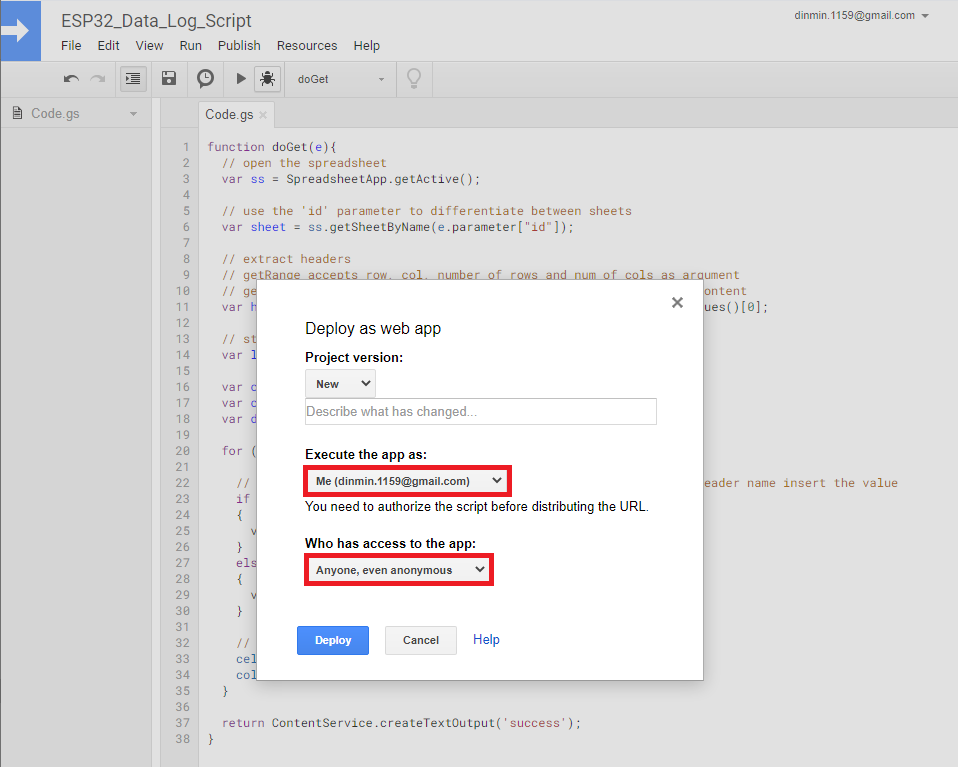
Click Deploy.
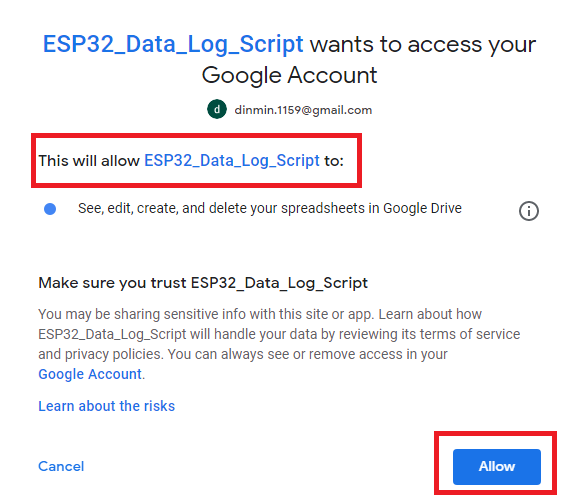
From the pop-up window click Review Permissions. This will open up a new windows to sign in to your Google account.
After Signing in the page in the new window will re-direct to a warning page. There click Advanced and click Go to yourscriptname (unsafe).
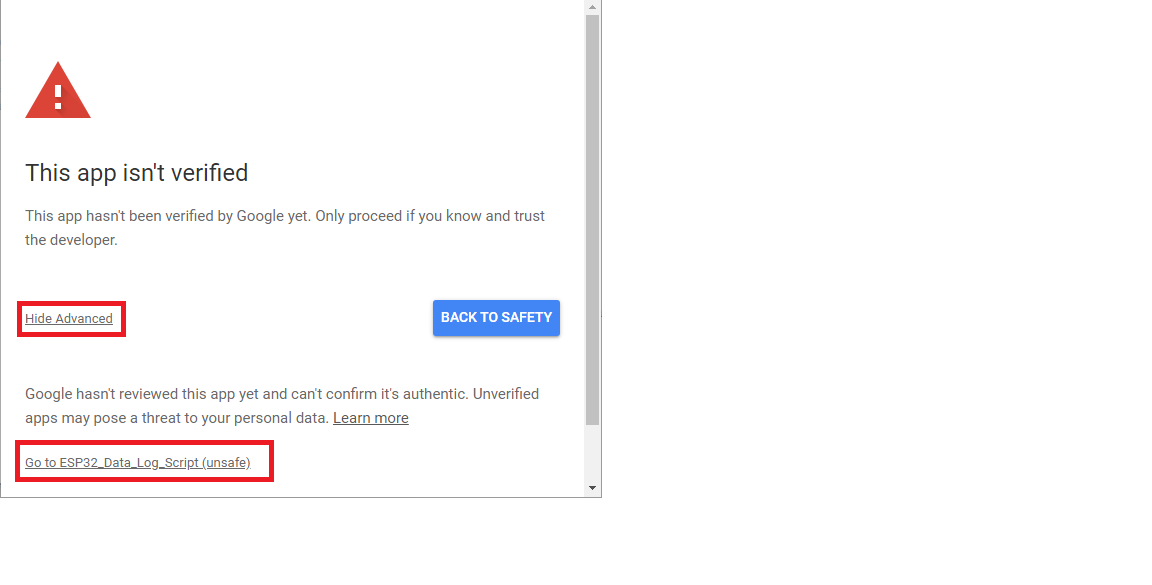
Then the page in the new window will direct to another page where you will be asked for permission to run the app. Click Allow .
Step 5
Copy and save the URL and click OK .
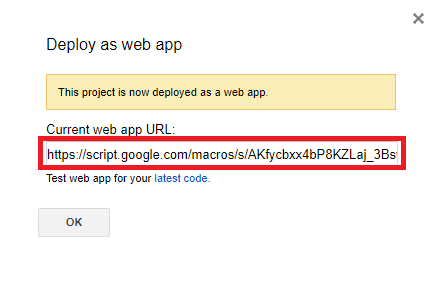
Your URL will look something like this:
https://script.google.com/macros/s/{yourkey}/exec
The yourkey is a unique key for that specific Google Sheet you created. Therefore do not share this key.
Step 6
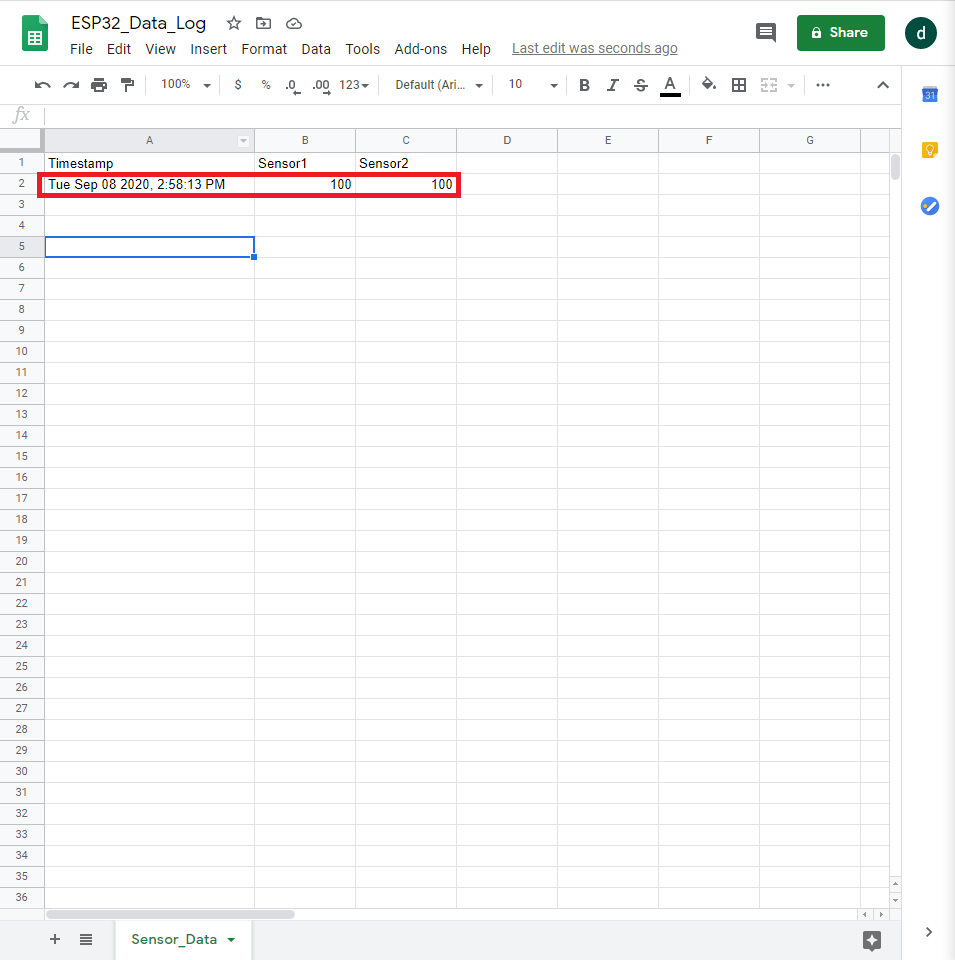
To test the server open a browser and enter the URL below.
https://script.google.com/macros/s/{your-key}/exec?id=Sensor_Data&Sensor1=100&Sensor2=100
If everything is correct, the word 'success' will be shown on your web page.
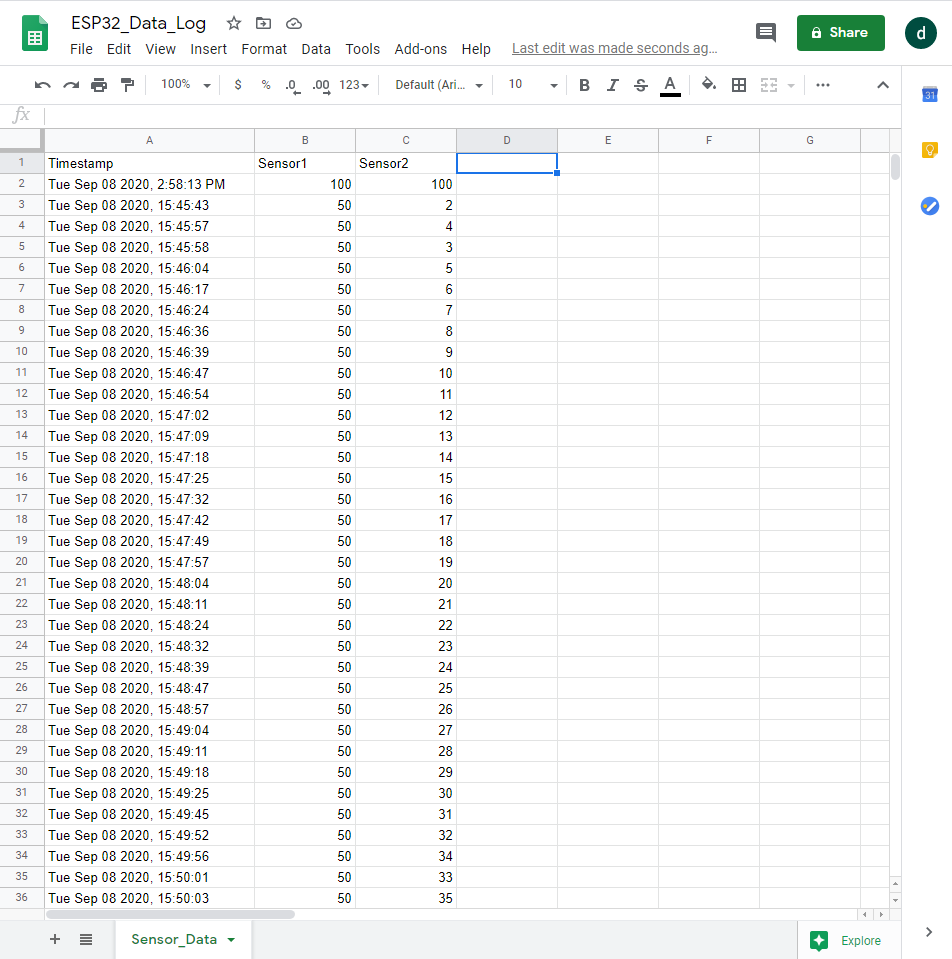
Now if you go back to your google sheet you will be able to see your data (sensor1 = 100, sensor2 = 100) been logged.
Congratulations you have successfully setup your Google sheet as the server!
Setting up the ESP32 as the client
Now we just need to replicate what we did in Step 6 using ESP32. Download and open the data_logger.slx and make the following changes.
•In the main system,
1.Edit the WIFI SSID
2.Edit the WIFI password
Note: All ESP32 boards only support 2.4GHz bandwidth (except the recently released ESP32-C5 which also supports 5GHz), so make sure the WiFi you connect your ESP32 board to in WiFi STA mode lies in the 2.4GHz frequency range
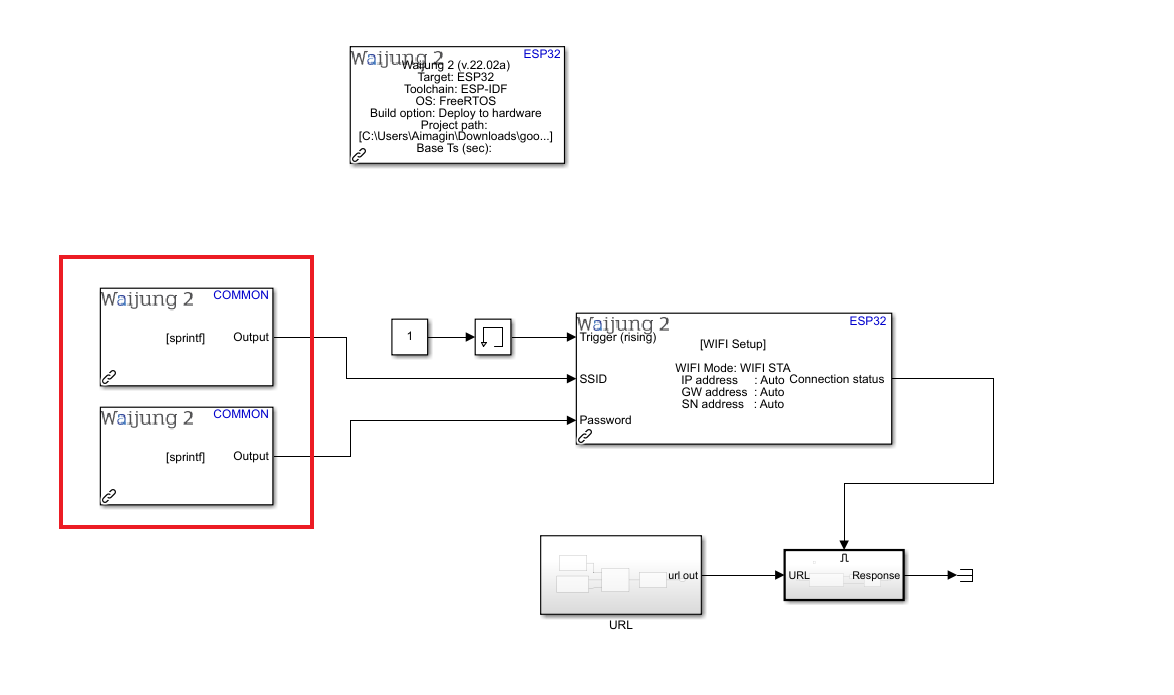
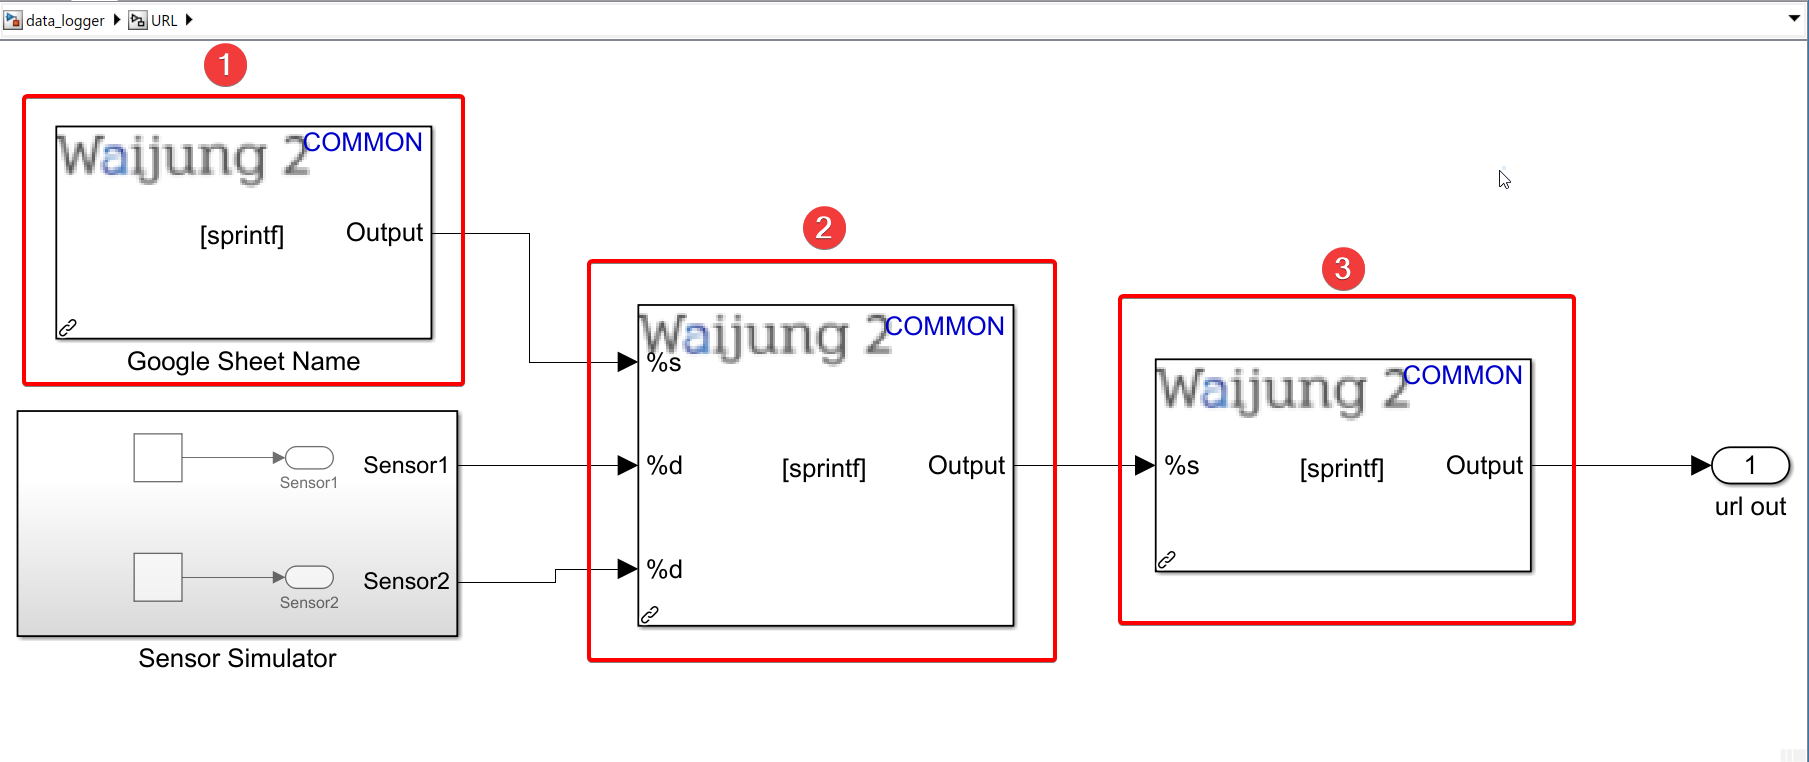
•In the URL subsystem,
1.Edit the Google sheet name.
2.Edit the column names of the Google sheet.
3.Replace the unique key of your Google sheet with the existing unique key.
Save and upload the code to the ESP32 board.
In this example, as sensors a constant block and a counter block is used to simulate the program. You can replace them with your sensor readings.
Result
After uploading you will be able to see the sensor values being updated on the Google Sheet every 5 seconds (you can change this sample time in the HTTP Client block)